Objective-C & SwiftUI Integration

Introduction
In the world of iOS app development, SwiftUI has gained significant popularity due to its modern, declarative approach to building user interfaces. However, there are times when you may need to leverage existing Objective-C view controllers in your SwiftUI project. Integrating Objective-C view controllers with SwiftUI allows you to tap into the vast ecosystem of Objective-C libraries, frameworks, and UI components while enjoying the benefits of SwiftUI's flexibility and simplicity. In this blog post, we will explore the seamless integration of Objective-C view controllers with SwiftUI, unlocking new possibilities for your app development endeavors.
The code in this post is available here.
If you like my posts, 😚consider tipping me at buymeacoffee.com/xavierios
What We’ll be Making
For demonstration purposes, we’re going to build a SwiftUI View which contains an Objective-C(OC) ViewController with a UILabel. And when we tap on the label, the label text switch between "Hello, SwiftUI View!" and "Hello, Objective-C ViewController!". Without further talking, let’s get started!
Step 1. Create an OC View Controller
Go to the project navigation and select a group where you’d like to save the OC view controller, right click and select New File…, then select Cocoa Touch Class.
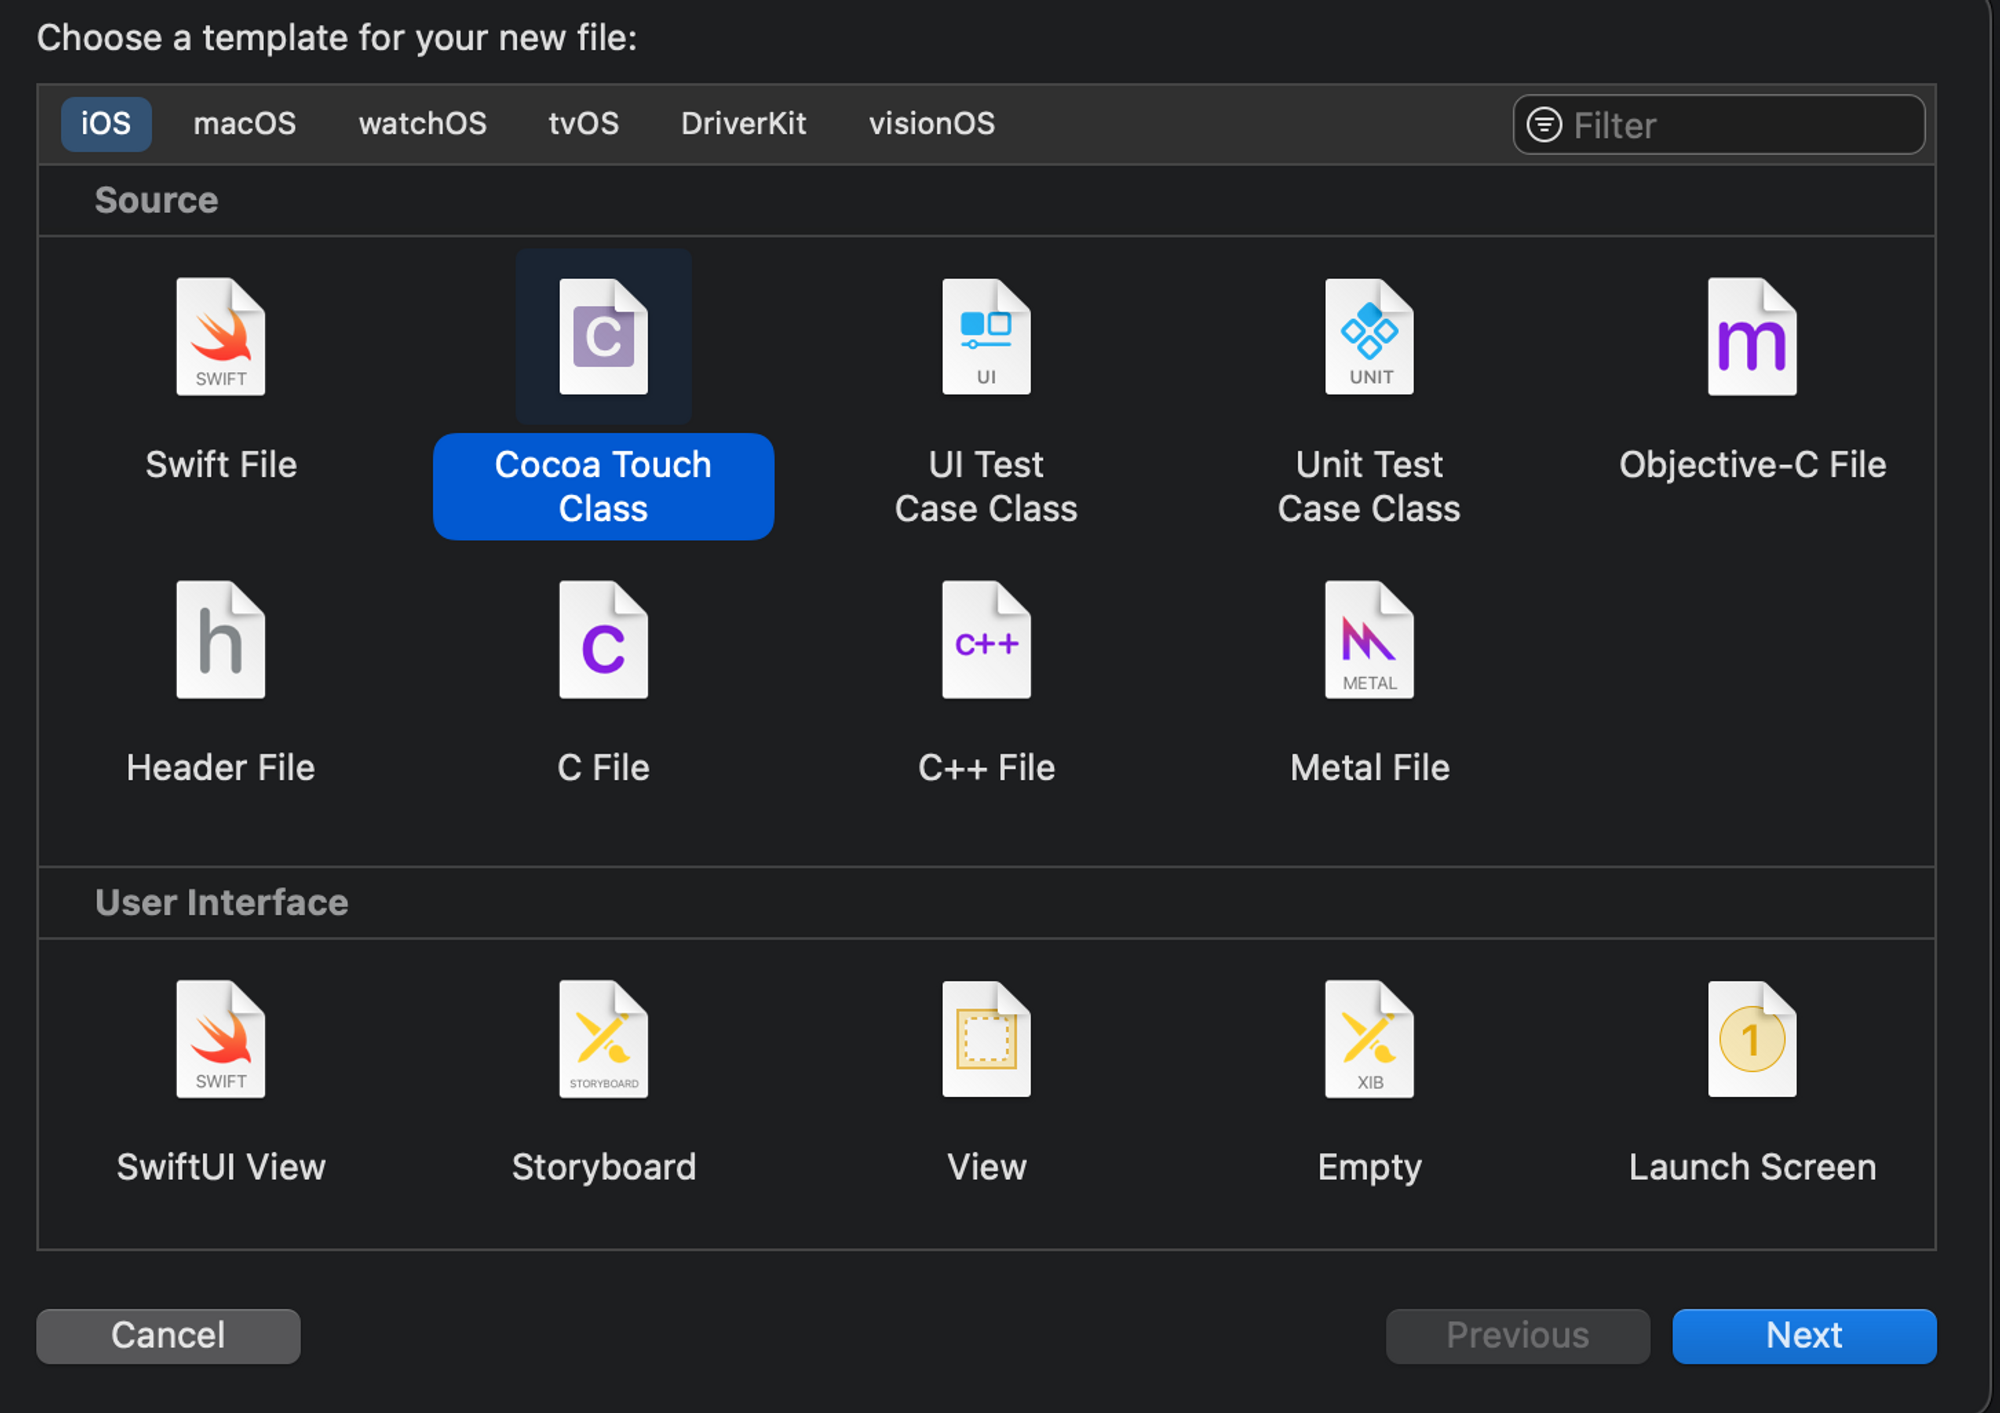
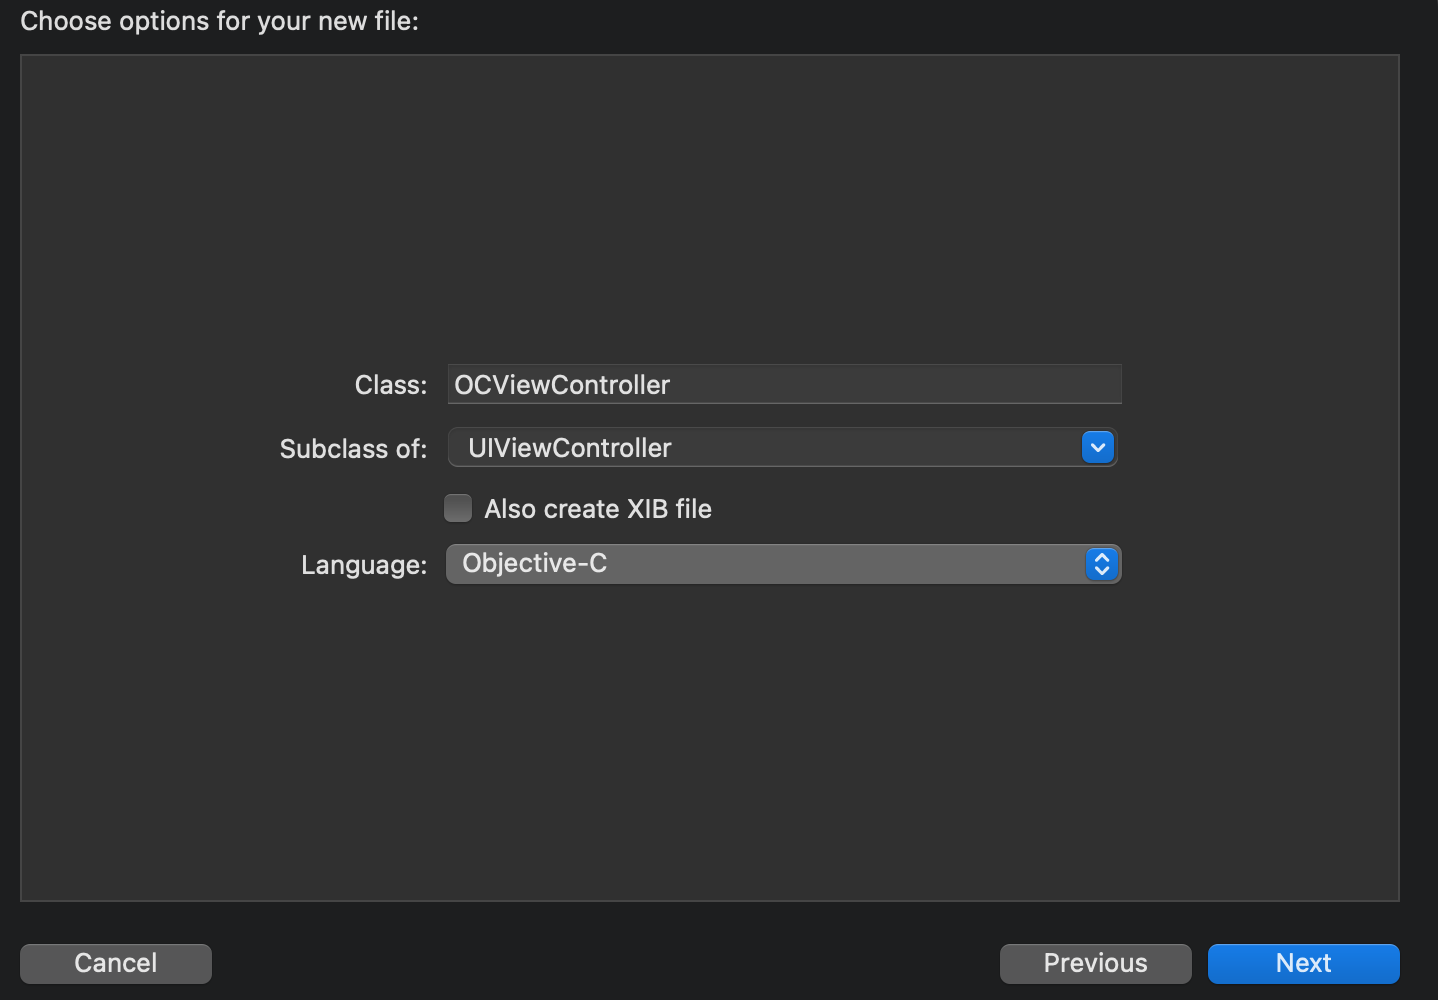
Tap Next and name the class as OCViewController and make sure it’s a subclass of UIViewController and the language is OC.
Step 2 - Create a Bridging Header
To use an OCView or OCViewController, the OC class should be exposed to Swift. Therefore, we need an OC bridging header that contains import expressions to expose the OC classes we need.
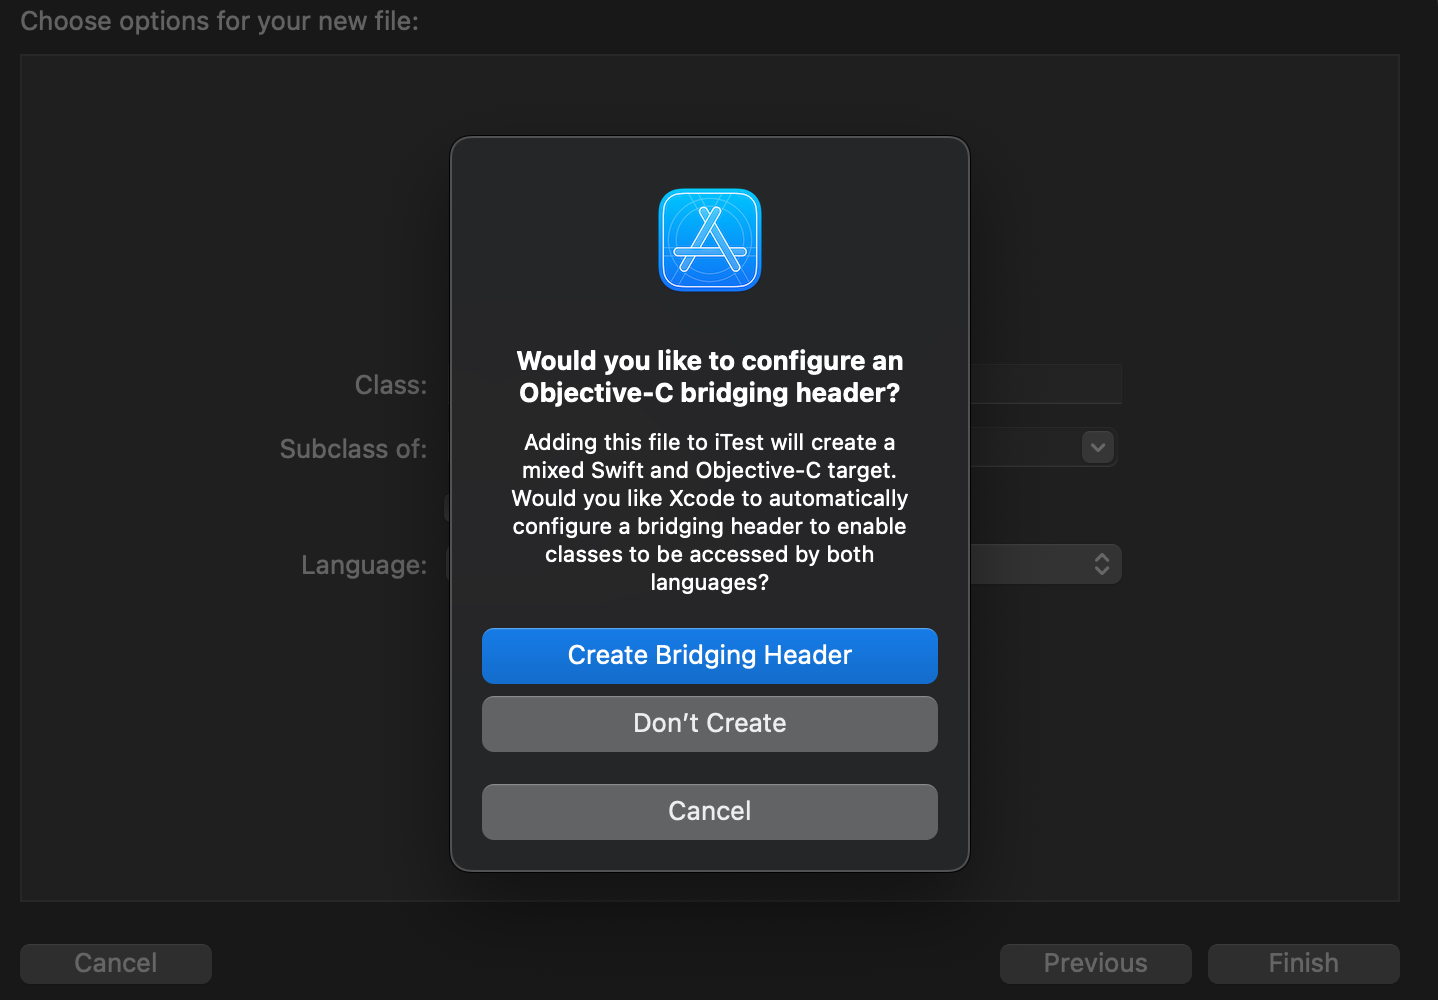
After Step 1, you should see an auto warning like below, select Create Bridging Header. If you canceled or selected Don’t Create accidentally, simply manually create a header file named as ProjectName-Bridging-Header.h.
Inside the header file, we just need an import expression to expose the class we need in Swift.
#import "OCViewController.h"
If you’re using a different name for the OC class, remember to replace the header name with the class name of your choice.
Step 3. Define the UILabel
Since we need access of the UILabel in Swift, it should be defined as a property and exposed in the header of the view controller header.
So go to OCViewController.h and declare a property of type UILabel.
@interface OCViewController : UIViewController
@property(nonatomic, strong, readwrite) UILabel *label;
@end
Step 4. Set up the UILabel in the View Controller
Now go to OCViewController.m to configure the UILabel and add it to the root view inside viewDidLoad method of the OCViewController.
@implementation DemoObjectiveCIntegration20230630_OCViewController

- (void)viewDidLoad {
    [super viewDidLoad];
    self.view.backgroundColor = [UIColor systemBackgroundColor];
    _label = [[UILabel alloc] initWithFrame:CGRectMake(0, 0, 300, 50)];
    _label.adjustsFontSizeToFitWidth = YES;
    _label.textColor = [UIColor systemCyanColor];
    _label.textAlignment = NSTextAlignmentCenter;
    _label.center = self.view.center;
    [self.view addSubview:_label];
}

@end
The code above:
Sets the background color of the view to the system background color using
[UIColor systemBackgroundColor].Creates an instance of
UILabelwith a frame of(0, 0, 300, 50)and assigns it to the**_label**property defined in Step 3.Sets the
adjustsFontSizeToFitWidthproperty of_labeltoYES, which enables adjusting the font size to fit the width of the label.Sets the text color of
_labelto the system cyan color using[UIColor systemCyanColor].Sets the text alignment of
_labelto center usingNSTextAlignmentCenter.Sets the center of
_labelto the center of the view usingself.view.center.Adds
_labelas a subview to the root view using[self.view addSubview:_label].
Step 5 - Create a SwiftUI View
Similar to Step 1, add a new file, but select SwiftUI View as the template. We’re going to replace the default text view Text("Hello, World!") with the OC view later.
//MARK: - SwiftUI View
    struct ContentView: View {
        var body: some View {
                        Text("Hello, World!")
        }
    }
    //MARK: - SwiftUI Preview
    struct ContentView_Previews: PreviewProvider {
        static var previews: some View {
            ContentView()
        }
    }
Step 6 - Create a UIViewControllerRepresentable Struct
To bring the OC view controller into SwiftUI view, we need to make a UIViewControllerRepresentable structure. This step is similar to integrating Swift UIKit to SwiftUI as demonstrated in the previous post Integrating UIKit into SwiftUI.
To do this, let’s create a struct called OCView and make it conform to the protocol UIViewControllerRepresentable. And this protocol contains two required methods - makeUIViewController and updateUIViewController.
struct OCView: UIViewControllerRepresentable {
        func makeUIViewController(context: Context) -> OCViewController {
            return OCViewController()
        }

        func updateUIViewController(_ uiViewController: OCViewController, context: Context) {
        }
    }
Step 8. Add Binding Logic
To toggle the UILabel text, we need a binding bool in the OCView struct, and then in the updateUIViewControllermethod, we can change the UILabel text.
struct OCView: UIViewControllerRepresentable {
        @Binding var showOC: Bool
        func makeUIViewController(context: Context) -> OCViewController {
            return OCViewController()
        }

        func updateUIViewController(_ uiViewController: OCViewController, context: Context) {
            uiViewController.label.text = showOC ? "Hello, Objective-C ViewController!" : "Hello, SwiftUI View!"
        }
    }
Inside the OCView struct, add the @Binding bool property called showOC.
Then inside the updateUIViewController method, we can use a ternary operator to check the value of showOC and update the UILabel text value accordingly.
Step 9. Update SwiftUI View
And finally, we can bring the OCView to the SwiftUI View. And to toggle the UILabel text, let’s add a state boolean property called showOC with an initial value of false. Then an onTapSture view modifier to toggle showOC then the OCView is tapped.
struct ContentView: View {
        @State private var showOC: Bool = false
        var body: some View {
            OCView(showOC: $showOC)
                .onTapGesture {
                    showOC.toggle()
                }
        }
    }
And that’s it! See how the integration works below:
Initial stage:

After tapping:

That’s all about OC integration with SwiftUI. In short, after definition of OC view controller and SwiftUI view, we need to make a representable struct for the OC view controller and use the struct inside SwiftUI whenever needed!
Again, If you like my posts, 😚consider tipping me at buymeacoffee.com/xavierios. Don’t forget to subscribe to my newsletter to get more posts like this via email updates!


