User Notifications in SwiftUI
In today’s post, I’m going to demonstrate how we can push local notifications from a SwiftUI app with UserNotifications.
The source code of this app is available here.
Overview
The procedure to push a notification can be summarized as below:
Request the user to grant the authorization to send notifications. If the user chooses not to allow it, the following steps won’t work and the user will need to allow it in the Settings app. Please note that the notification option is not available in the Settings app in an Xcode simulator, so when you’re trying to test the app, please press "Allow" when prompted. If "Don’t allow" is tapped by mistake, simply uninstall the app and run it again from Xcode.
Define the content of the notification. The content contains a title, a subtitle, a sound, a number to show on the badge etc.
Define the trigger of the notification. This means after how many seconds the notification should be pushed, and if it repeats.
Define the notification request.
Add the request to User Notification Center, which processes the request and will trigger the notification after the time defined.
So let’s get started.
Step 1 - Define a function and request authorization
First, create a SwiftUI project and the ContentView, define a function called scheduleNotification.
func scheduleNotification() {}
Before we move on, we need to import UserNotifications first. So add the import statements after import SwiftUI before the content view.
import SwiftUI
import UserNotifications
Now in the function, let’s write the code to request the user to allow the app send notifications. The class UNUserNotificationCenter manages the notifications, and it has a function current() that returns the UNUserNotificationCenter instance of the current app. Then the function requestAuthorization is how we prompt the user to allow notifications. The parameter options is an array of UNAuthorizationOptions, which can contain notification types like "alert", "badge", "sound", "carplay", "time sensitive" etc. In the completion handler, we can print the error message if the app is not granted with authorization to push notifications. Typically when the user doesn’t select allow, the completion result is an error.
func scheduleNotification() {
    //Request Access
    UNUserNotificationCenter.current().requestAuthorization(options: [.alert, .badge, .sound]) { _, error in
        if let error {
            print("Notification access not granted.", error.localizedDescription)
        }
    }
}
Step 2 - Define the Content of the Notification
As mentioned in the overview section, the content can contain a title and a subtitle. So let’s add these as the parameter of the function and then assign them to the content.
func sendNotification(title: String, subtitle: String) {
    UNUserNotificationCenter.current().requestAuthorization(options: [.alert, .badge, .sound]) { success, error in
        if let error {
            print("Notification access not granted.", error.localizedDescription)
        }
    }
    // Define the content
    let content = UNMutableNotificationContent()
    content.title = title
    content.subtitle = subtitle
    content.sound = .default
}
Step 3 - Define the trigger
Now let’s add another two parameter to the function
secondsLaterwith a type ofTimeInterval; it means after how many seconds the notification will be triggered.isRepeatingwith a type ofBool. It means if the notification will repeat. Please note that for repeating notifications, the time interval must be no less than 60 seconds.
func sendNotification(title: String, subtitle: String, secondsLater: TimeInterval, isRepeating: Bool) {
    //.... code from previous steps
    let trigger = UNTimeIntervalNotificationTrigger(timeInterval: secondsLater, repeats: isRepeating)
Step 4 - Define the request
Now add the line below after the definition of the trigger.
The notification request’s initializer requires three parameters:
identifier: this can be any string that’s unique. You can use
UUID().uuidString, or a timestamp followed by the user id (eg."\(Date().ISO8601Format())-User1234") etc.content: the content we defined in Step 2
trigger: the trigger we defined in Step 3
let request = UNNotificationRequest(identifier: UUID().uuidString, content: content, trigger: trigger)
Step 5 - Add the notification request to Notification Center
Below the definition of the request, add the line below to add the request to the notification center of the current app.
UNUserNotificationCenter.current().add(request)
Step 6 - Update the content view
Almost there but just one more step to code.
We need a trigger in the view to invoke the function right? So in the content view, replace the default code with a button. Give it a label and the action of this button is to call the function we defined. You can pass in a title and a subtitle you’d like to see. As for the time interval, it’s better to have it more than 5 seconds as we need to lock the screen of the simulator to see the notification.
struct ContentView: View {
    var body: some View {
        VStack {
            Button("Tap me to activate notification") {
                scheduleNotification(title: "1 new message", subtitle: "The meeting tomorrow is rescheduled...", secondsLater: 5, isRepeating: false)
            }
        }
    }
}
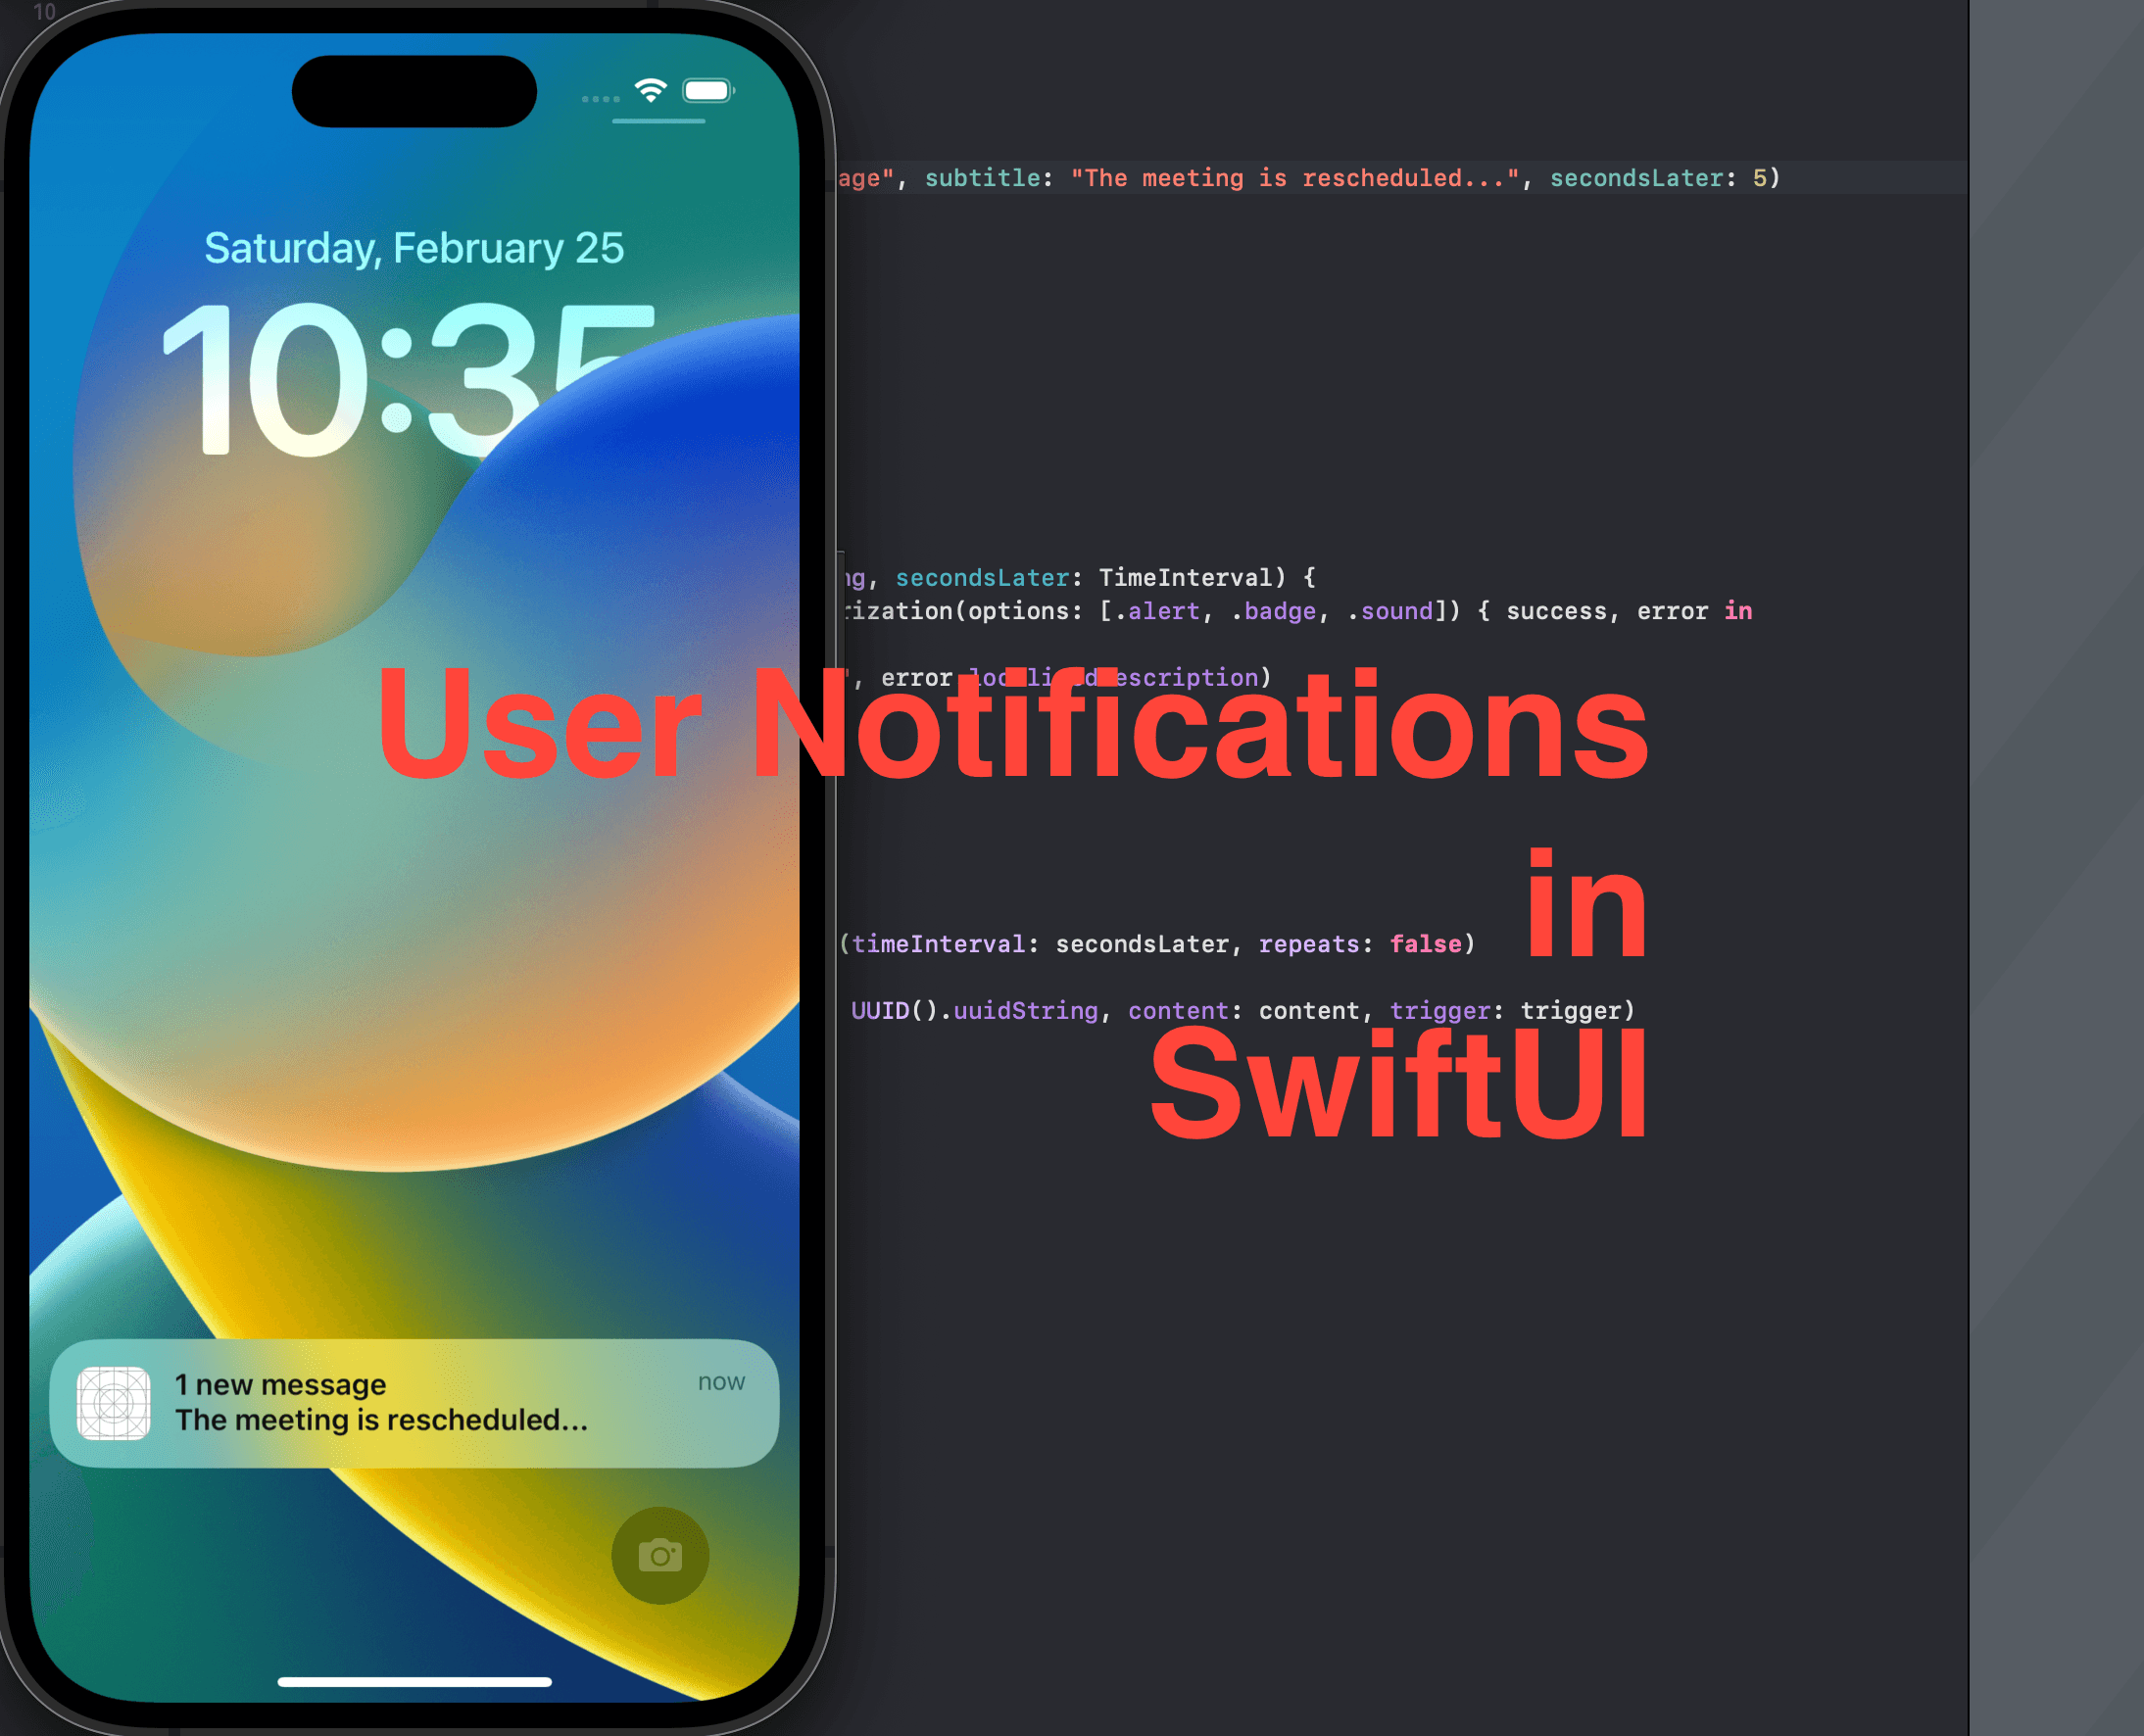
Once done, run the app in the simulator. Tap the button and lock the screen of the simulator with the power button on the right-hand side, or by pressing cmd + L as in Lock. After 5 seconds, you should see the notification just defined.

Well, that’s everything for today. I hope this post is helpful and see you all tomorrow in the next post! Don’t forget to leave a comment and subscribe to the newsletter.


