Swipe Actions in SwiftUI
Hi all, in a previous post about Core Data, we built a view with a list of notes, where users can swipe a row of a note to have it deleted. Today, let’s dive into the swipe actions in SwiftUI.
The source code of this post is available here.
Step 0 - Overview
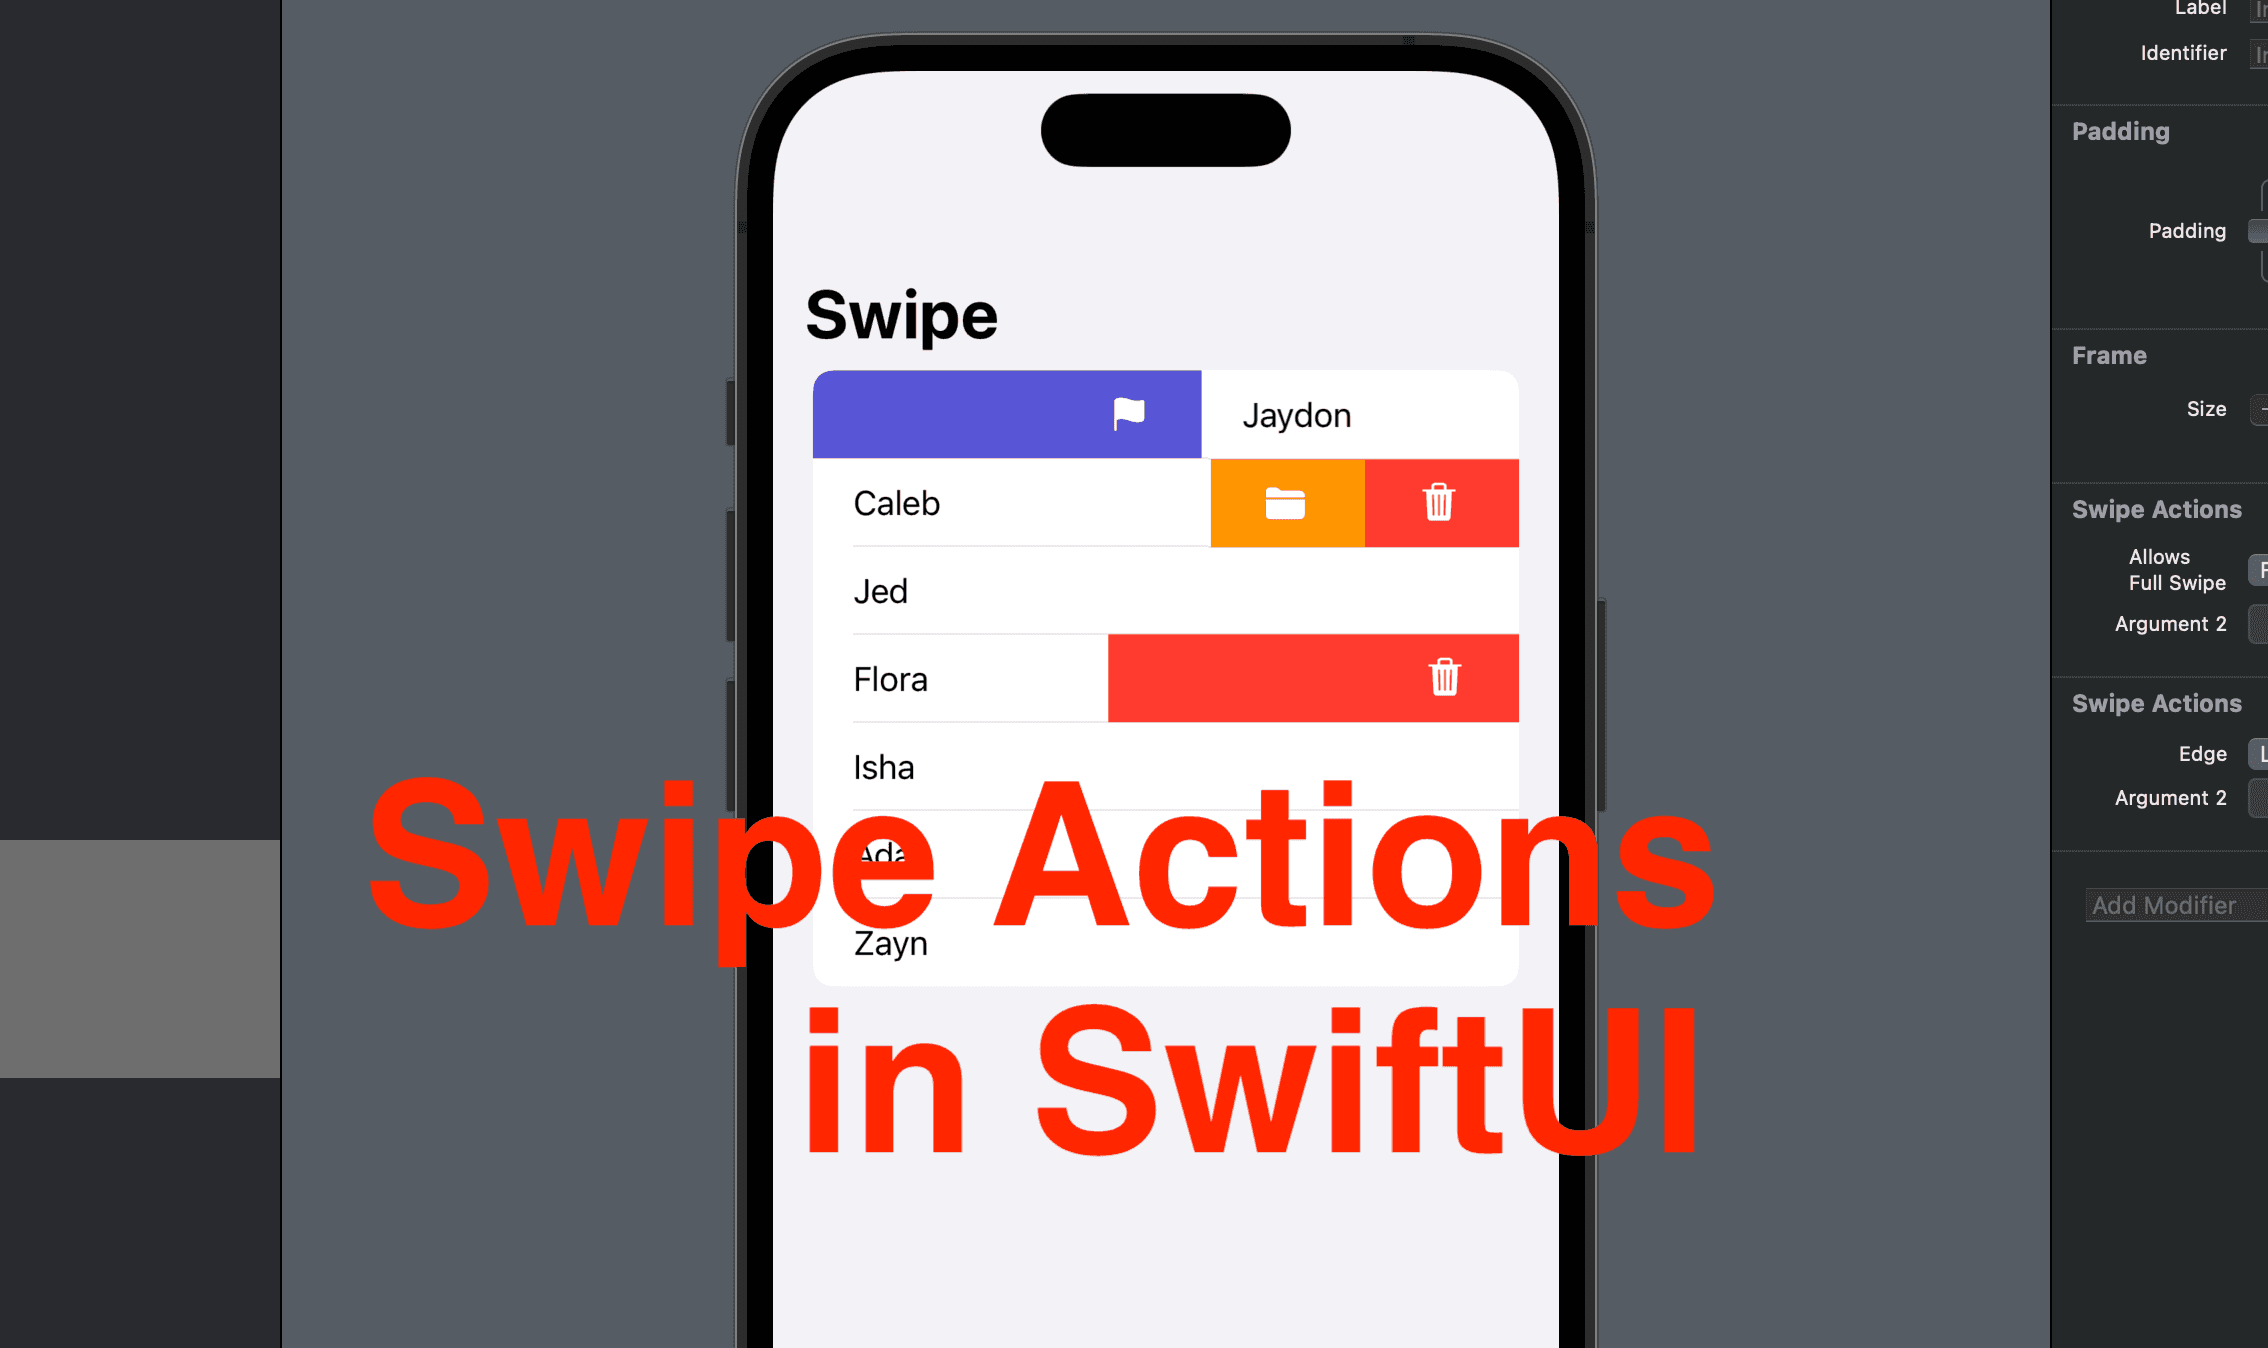
We’re going to build a simple list, in which a series of names are displayed. If the user swipes a row from left to right, the view presents an indigo flag button and presents two buttons for moving and deletion actions if the swipe action is in the opposite direction.
The effect is as in the screenshots below.


Step 1 - Add an array as the data source
Add an array of Strings, and call it names. Remember to add the @State property wrapper since this array will change in the view.
struct ContentView: View {
    @State var names = ["Jaydon", "Caleb", "Jed", "Flora", "Isha", "Ada", "Zayn"]
    var body: some View {
        //...
    }
}
Step 2 - Add the list in the ContentView
In the body property of content view, add a Navigation Stack with a List. This list element contains a ForEach with names as the data source. Since strings are not instance of an entity that conforms to identifiable, we can use id: \.self to use the strings themselves as the identifier in ForEach. Inside ForEach we simply declare a Text view with the value of the name element inside a HStack.
struct ContentView: View {
    @State var names = ["Jaydon", "Caleb", "Jed", "Flora", "Isha", "Ada", "Zayn"]
    var body: some View {
        NavigationStack {
            List {
                ForEach(names, id: \.self) { name in
                    HStack {
                        Text(name)
                    }
                }
            }
        }
    }
}
Step 3 - Add a swipe action and a delete button
After the HStack add a .swipeActions modifiers. Then add a button to delete the name item inside the modifier.
HStack {
    Text(name)
}
.swipeActions {
    Button(role: .destructive) {
        names.removeAll { $0 == name }
        // or delete function for custom objects
    } label: {
        Label("Delete", systemImage: "trash")
    }
}
Now should be able to swipe from right to left to delete an item. However, it might be a problem if a destructive button like the one we created, can be swiped and the action gets performed without a confirmation or at least a pause for the users to double-check. Therefore, we can use another parameter: allowsFullSwipe to apply this limit. allowsFullSwipe is a boolean value that can be passed to .swipeActions. It’s true by default, where users can swipe the row all the way to the end and perform the button action without a pause. When it’s set to false, the user can only swipe the row for a limited distance and have to tap the button again to perform the button action.
.swipeActions(allowsFullSwipe: false) {
    Button(role: .destructive) {
        names.removeAll { $0 == name }
        // or delete function for custom objects
    } label: {
        Label("Delete", systemImage: "trash")
    }
}
- Max distance of swiping if
allowsFullSwipeis true

- Max distance of swiping if
allowsFullSwipeis false

Step 4 - Multiple Buttons
Now you might be wondering: how can I add two buttons to provide the users with different options? This can be done by simply declaring another button inside the .swipeActions modifier.
And to tell the differences between buttons more apparently, we can add a .tint modifier to the button, and give it a color. i.e. the in the example below, I made the Move button have a tint color of orange.
.swipeActions(allowsFullSwipe: false) {
    Button(role: .destructive) {
        names.removeAll { $0 == name }
        // or delete function for custom objects
    } label: {
        Label("Delete", systemImage: "trash")
    }
    Button(role: .cancel) {
        // code to move goes here
    } label: {
        Label("Move", systemImage: "folder.fill")
    }
    .tint(.orange)
}

Step 5 - One more parameter
Last but not least, there’s another parameter for .swipeActions modifier: edge.
This parameter is of type HorizontalEdge, which means we can pass a .leading or .trailing. You can tell from the demo above, its default value is .trailing.
Now let’s try to add a favorite button presented on the swipe gesture from left to right.
The code below passes .leading to the swipeActions modifier and now you should see an indigo button when you swipe from the leading edge. As shown in the screenshot below.
.swipeActions(edge: .leading) {
    Button(role: .cancel) {
        // code to like goes here
    } label: {
        Label("Favorite", systemImage: "flag")
    }
    .tint(.indigo)
}

That’s everything for today. Swipe gestures are powerful and we only looked at the swipes in a list in SwiftUI. If you’re interested in knowing more, leave a comment and remember to subscribe to my newsletter. See you all tomorrow!


