Sort an Array of Custom Objects in Swift
Hi all readers, Happy Valentine’s Day! 💕
Today we’re going to explore how we can sort an array of custom objects by the value of their properties.
The source code of this post is available here.
Step 0 - Overview
Say I’m working with an array of objects of Reminder, which has the following properties:
ID - UUID
desc - String
isFavorite - Bool
dueDate - Date
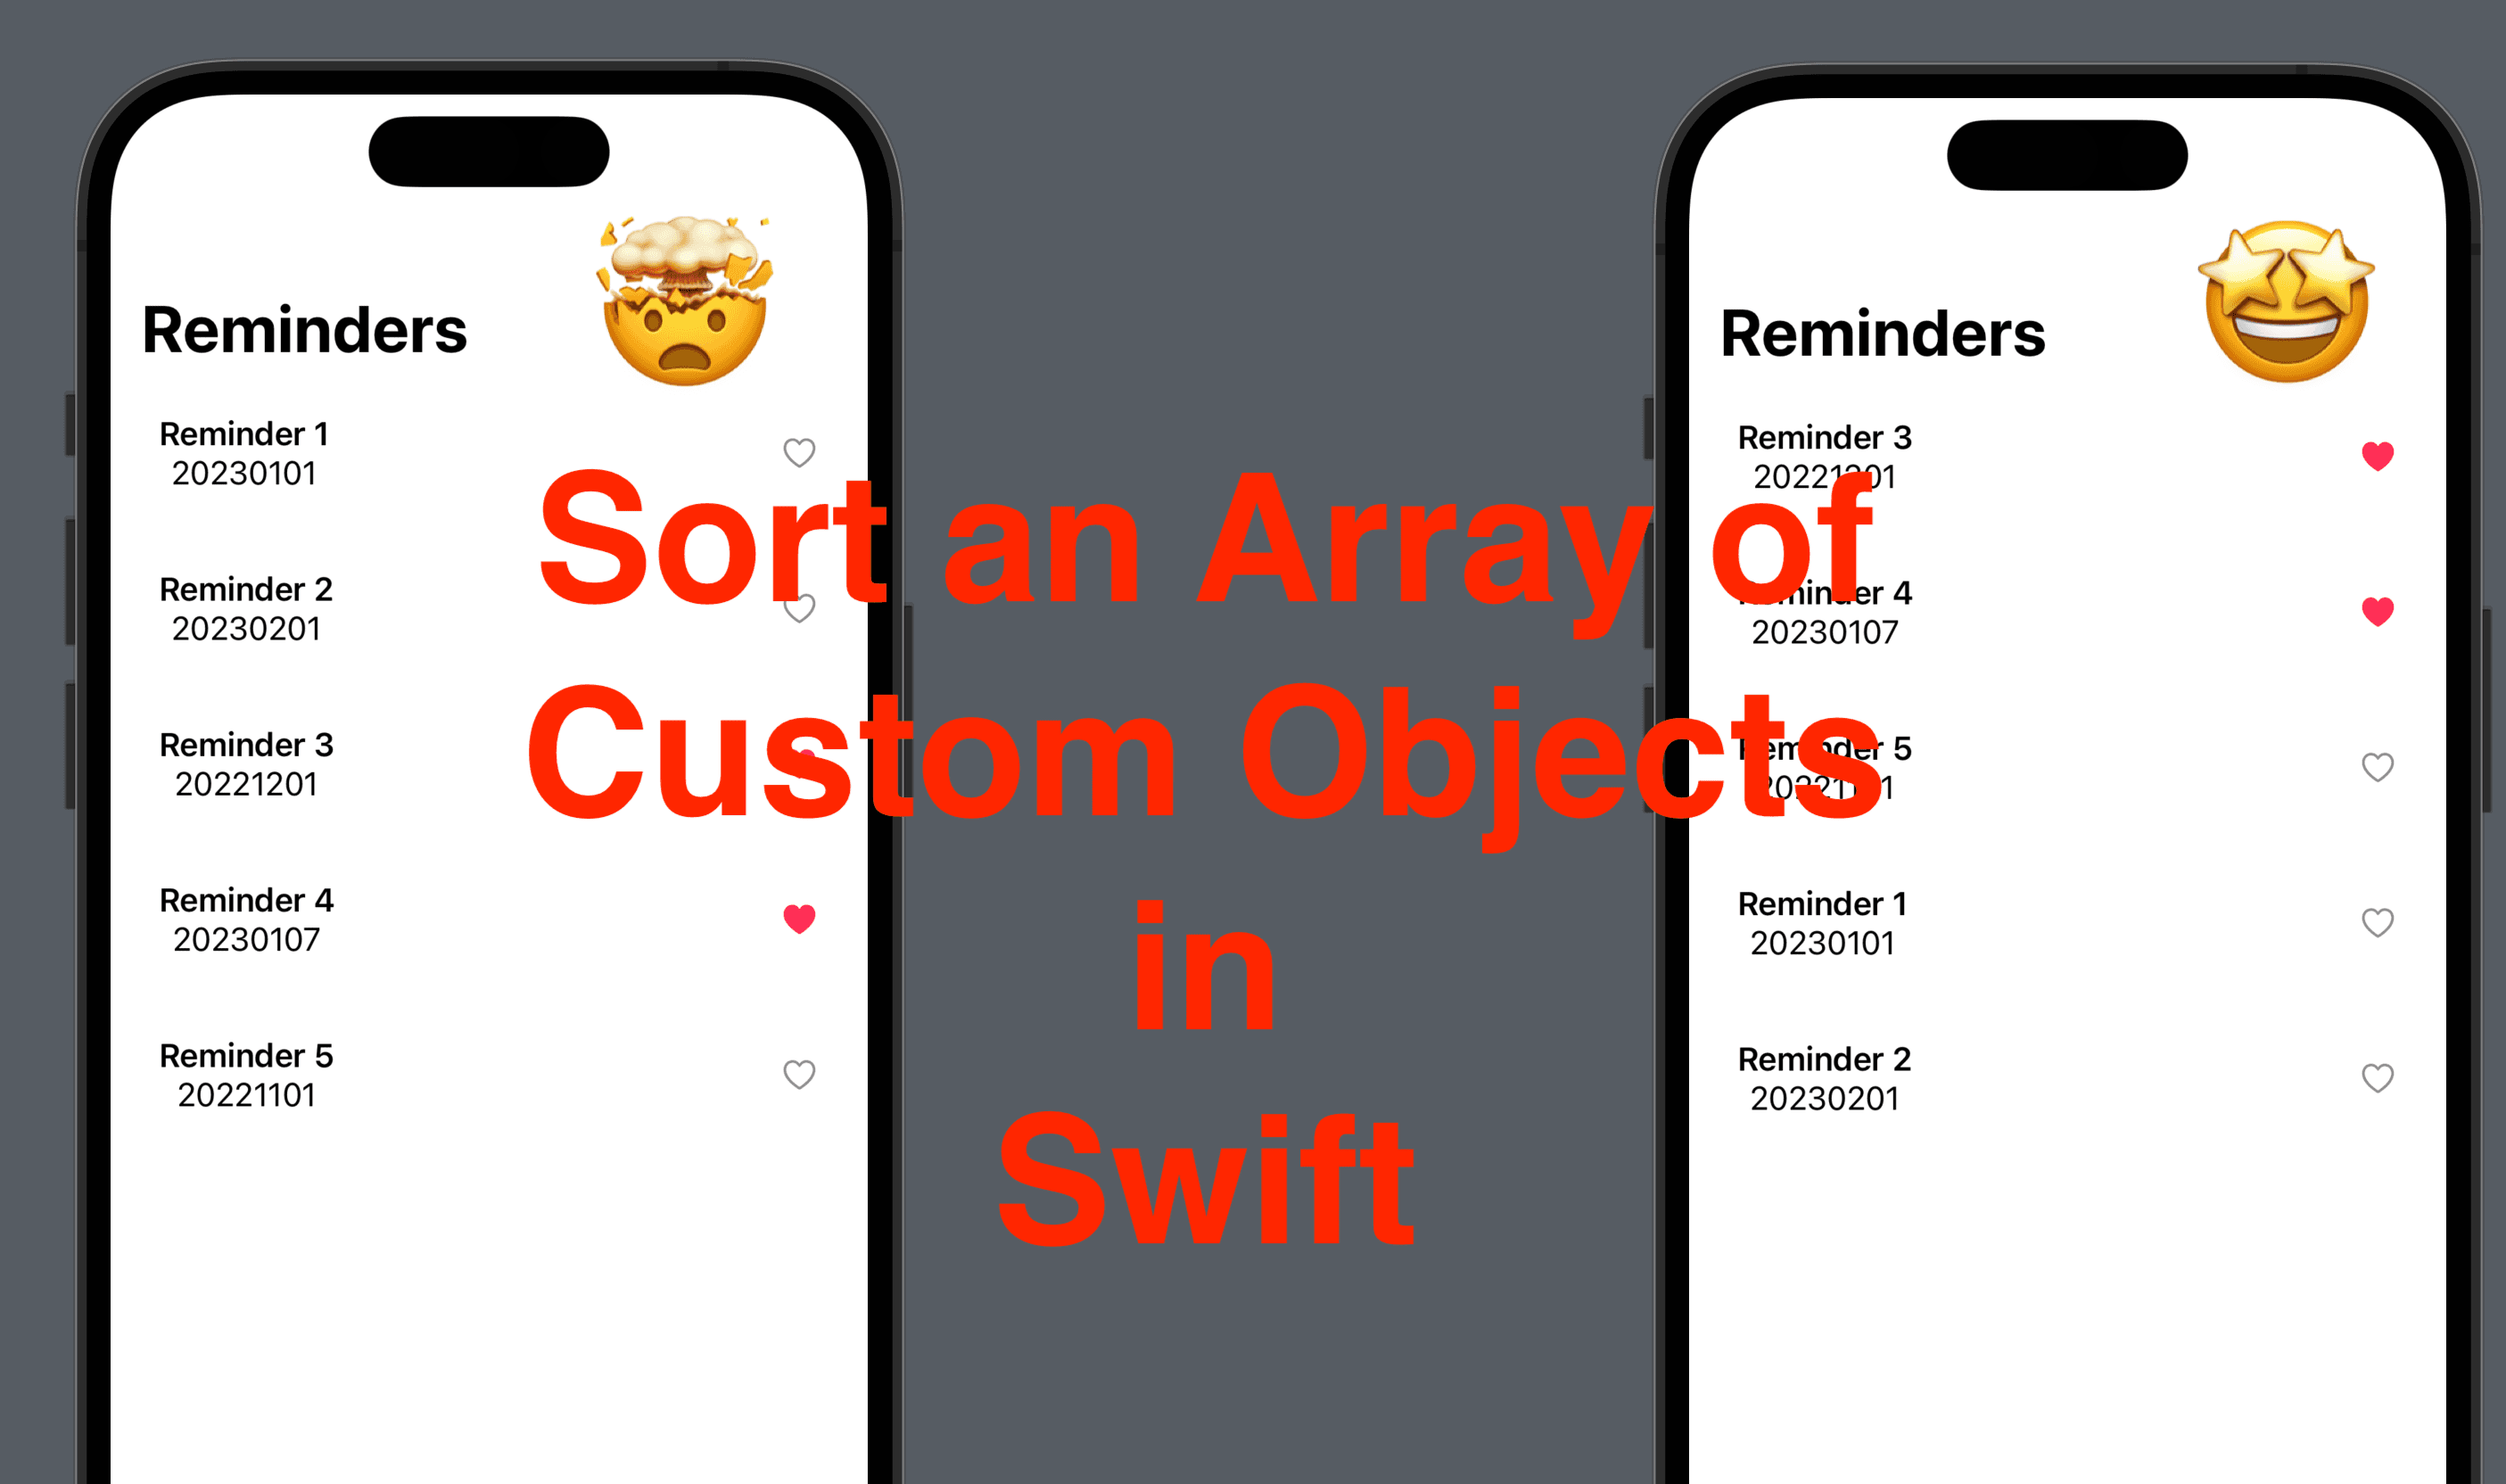
And this array with a random order to be sorted, so that favorite reminders and be displayed at the top, and then ascending by its due date.
Now let’s Xcode and figure out how!
Step 1 - Prepare the data source
Create a new project and add a .swift file (select Swift file under source, instead of SwiftUI view).
In this file, declare a struct named Reminder with the properties mentioned above.
Then add two extensions - for the Date and String class, so we can convert a date to a string and vice versa.
Lastly, declare an array of Reminder objects. With different values of isFavorite and dueDate.
struct Reminder {
    let id: UUID
    let desc: String
    let isFavorite: Bool
    let dueDate: Date

    init(desc: String, isFavorite: Bool, dueDate: Date) {
        self.id = UUID()
        self.desc = desc
        self.isFavorite = isFavorite
        self.dueDate = dueDate
    }
}

extension String {
    func asDateYYYYMMDD() -> Date {
        let dateFormatter = DateFormatter()
        dateFormatter.dateFormat = "yyyyMMdd"
        return dateFormatter.date(from: self) ?? Date()
    }
}

extension Date {
    func asStringYYYYMMDD() -> String {
        let dateFormatter = DateFormatter()
        dateFormatter.dateFormat = "yyyyMMdd"
        return dateFormatter.string(from: self)
    }
}


let reminders: [Reminder] = [
    .init(desc: "Reminder 1", isFavorite: false, dueDate: "20230101".asDateYYYYMMDD()),
    .init(desc: "Reminder 2", isFavorite: false, dueDate: "20230201".asDateYYYYMMDD()),
    .init(desc: "Reminder 3", isFavorite: true, dueDate: "20221201".asDateYYYYMMDD()),
    .init(desc: "Reminder 4", isFavorite: true, dueDate: "20230107".asDateYYYYMMDD()),
    .init(desc: "Reminder 5", isFavorite: false, dueDate: "20221101".asDateYYYYMMDD())
]
Step 2 - Prepare the ContentView
Make a ForEach list to display an HStack with the value of description, dueDate for each item in the reminders array. And in the HStack, the "heart" image is a pink "heart.fill" when the reminder is favorite, and a gray "heart" when it’s not.
struct ContentView: View {
    var body: some View {
        NavigationView {
            ScrollView {
                ForEach(reminders, id: \.id) { reminder in
                    HStack {
                        VStack {
                           Text(reminder.desc).bold()
                           Text(reminder.dueDate.asStringYYYYMMDD())
                        }
                        Spacer()
                        Image(systemName: reminder.isFavorite ? "heart.fill" : "heart")
                        .foregroundColor(reminder.isFavorite ? .pink : .secondary)
                    }
                    .padding(.horizontal, 25)
                    .padding(.vertical)
                }
            }
            .navigationTitle("Reminders")
        }
    }
}

Step 3 - Sort the array
In the preview above, the array is displayed in the SwiftUI view, but it doesn’t seem that the order makes any sense. So now let’s sort the array.
Add a private computed property in your content view named sortedReminders. Call the function sorted. In the closure, we need to compare two reminders and return a boolean value. That being said, if the condition returned by the closure is true, the sorted array will place reminder1 before reminder2.
So let’s see through the closure:
First, if isFavorite are the same for both reminders (no matter they are both favorited or not), we need to compare the value of dueDate, whoever is lower should come first. Second, if isFavorite are different, we just need to put the favorite one first.
This piece of logic goes into the code below.
struct ContentView: View {
    private var sortedReminders: [Reminder] {
        reminders.sorted { reminder1, reminder2 in
            if reminder1.isFavorite == reminder2.isFavorite {
                return reminder1.dueDate < reminder2.dueDate
            } else {
                return reminder1.isFavorite
            }
        }
    }
    var body: some View {
        //...
    }
}
Once done with the computed property, let update the data source of the ForEach element from reminders to sortedReminders .
ForEach(sortedReminders, id: \.id) { reminder in
Now you can see that favorite reminders are shown first, and no matter if an item is favorite or not, it comes first if its due date is nearer that others.

Step 4 - Shorthand Syntax for the sort function
To be honest, the sort closure above is quite redundant. Instead, we can have it tidier with a shorthand syntax in Swift.
Now let’s add a new computed property named sortedRemindersv2 and add v2 after the array in ForEach data source in the view.
This time we need just one line in the closure:
{ $0.isFavorite == $1.isFavorite ? ($0.dueDate < $1.dueDate) : $0.isFavorite }
$0 and $1 are basically reminder1 and reminder2 from Step 3, and there’s no need to write reminder1, reminder 2 in now.
And this line is using the ternary operator bool ? valueIfTrue : valueIfFalse
$0.isFavorite == $1.isFavorite checks if both reminders are/are not favorite. If isFavorite are the same for both, this line is going to return $0.dueDate < $1.dueDate , which put the nearer due date at the top. If not, the favorite one will come first.
// new computed property
private var sortedRemindersv2: [Reminder] {
    reminders.sorted { $0.isFavorite == $1.isFavorite ? ($0.dueDate < $1.dueDate) : $0.isFavorite }
}
var body: some View {
    NavigationView {
        ScrollView {
            // remember to update here too!
            ForEach(sortedRemindersv2, id: \.id) { reminder in
With the code updated, you should see the same result from Step 3 in the preview.
That’s all for this post, hope you learned how to sort an array of custom objects. Again, Happy Valentine’s Day. Remember to leave a comment and subscribe to my newsletter. I’ll see you all tomorrow!


