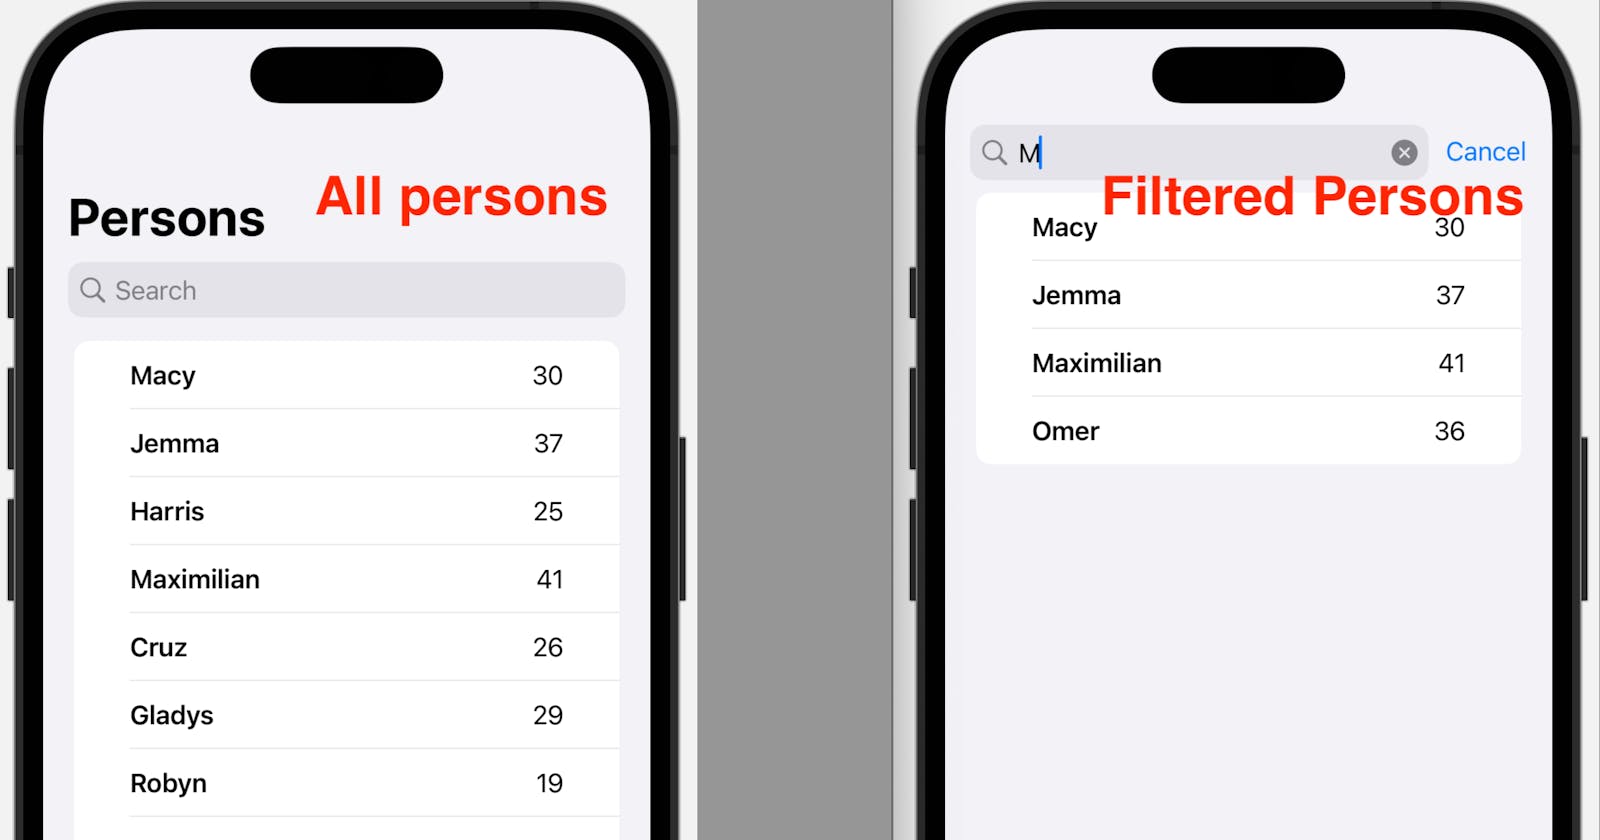
This post demos how you can use .searchable modifiers to create a search bar for your List in SwiftUI.
Let’s create a list of Person object, show the name and age in a list view, and then make the list searchable, allowing the user to search for a Person object by its name or age.
The source code of the demo is available here.
(This demo uses the MVVM design pattern.)
Step 1. Create the Person struct (model)
Simple, just declare a struct with two properties. But notice that you need to make Person conform to the Hashable protocol in order to use ForEach in the list view.
struct Person: Hashable {
    var name: String
    var age: Int
}
Step 2. Create a View Model that loads your data
Typically, you might need a manager to fetch the data first. For demo purposes, let’s create a list of Person objects in the initializer View Model.
class ViewModel: ObservableObject {
    @Published var persons: [Person]

    init() {
        self.persons = [
            Person(name: "Macy", age: 30),
            Person(name: "Jemma", age: 37),
            Person(name: "Harris", age: 25),
            Person(name: "Maximilian", age: 41),
            Person(name: "Cruz", age: 26),
            Person(name: "Gladys", age: 29),
            Person(name: "Robyn", age: 19),
            Person(name: "Hiba", age: 80),
            Person(name: "Issac", age: 22),
            Person(name: "Omer", age: 36),
        ]
    }
}
Step 3. Create a SwiftUI View with a List
In the SwiftUI View struct:
Declare the View Model;
Use
ForEachto create a List for the array in the View Model. Each item in the array will be presented with a text of its name and a text of its age.
struct ContentView: View {

    @StateObject private var vm = ViewModel()

    var body: some View {
        NavigationView {
            List {
                ForEach(vm.persons, id: \.self) { person in
                    HStack {
                        Text(person.name)
                            .bold()
                        Spacer()
                        Text("\(person.age)")
                    }
                    .padding(.horizontal)
                }
            }
            .navigationTitle("Persons")
        }
    }
}
Step 4. Add the .searchable modifier
You might have noticed that the data source used by ForEach is the full array coming from the ViewModel. Not let’s do the magic.
Add the .searchable modifier to our list. Add it will ask for a Binding<String>. That’s for the users to type in the keyword they’d like to use for searching.
Now you should be able to see a search bar above the list.
struct ContentView: View {

    @StateObject private var vm = ViewModel()
    //-------New line: added searchText to reflect users’ input
    @State private var searchText: String = ""

    var body: some View {
        NavigationView {
            List {
                ForEach(vm.persons, id: \.self) { person in
                    HStack {
                        Text(person.name)
                            .bold()
                        Spacer()
                        Text("\(person.age)")
                    }
                    .padding(.horizontal)
                }
            }
            .navigationTitle("Persons")
            //-------New line: Searchable Modifier
            .searchable(text: $searchText)
        }
    }
}
Step 5. Update the data source for the View
Now we need to update the list according to the value of searchText.
To do that, we need a temp array (filteredPersons) in the view to tell ForEach what objects to use.
The filteredPersons is a computed property: if no searchText is input, it’s returning the full array as in the view model; if searchText is not empty, we’re using .filter of arrays to filter the persons by name and age.
struct ContentView: View {

    @StateObject private var vm = ViewModel()

    @State private var searchText: String = ""

    //-------New lines: filteredPersons to be used in ForEach
    var filteredPersons: [Person] {
        if searchText == "" {
            //show all persons if no searchText input
            return vm.persons
        } else {
            return vm.persons.filter { person in

                //filter the persons by name or age
                person.name.lowercased().contains(searchText.lowercased()) // comparing the lowercased texts
                ||
                "\(person.age)".contains(searchText) // comparing the input against the person’s age as a text
            }
        }
    }

    var body: some View {
        NavigationView {
            List {
                //-------Changed line: data source should now be the filteredPersons array
                ForEach(filteredPersons, id: \.self) { person in
                    HStack {
                        Text(person.name)
                            .bold()
                        Spacer()
                        Text("\(person.age)")
                    }
                    .padding(.horizontal)
                }
            }
            .navigationTitle("Persons")
            .searchable(text: $searchText)
        }
    }
}
And that’s it. Now you should be able to see persons whose name or age contains the value of your input.

