Redaction in SwiftUI

One useful feature of SwiftUI is the ability to redact content, which allows developers to obscure sensitive information in their apps. In this blog post, we’ll explore how to use redaction in SwiftUI.
The code of this post is available here.
What is redaction?
Redaction is the process of obscuring or removing sensitive information from a document or other medium. In the context of SwiftUI, redaction is used to obscure content that is sensitive or private, such as personal information or financial data.
How to use redaction in SwiftUI
To use redaction in SwiftUI, we can use the redaction() modifier, which allows us to specify the areas of a view that should be redacted. Let’s take a look at an example.
First, create a simple view without any redaction.
struct ContentView: View {
    let name = "John Doe"
    let email = "johndoe@example.com"
    let creditCard = "1234 5678 9012 3456"

    var body: some View {
        VStack(alignment: .leading) {
            Text("Profile")
                .underline()
                .bold()
            Image("demo")
                .resizable()
                .clipShape(Circle())
                .frame(width: 120, height: 120, alignment: .center)
            Text(name)
                .foregroundColor(.pink)
                .font(.largeTitle)
                .bold()
            Text(email)
                .foregroundColor(.blue)
                .bold()
            Text(creditCard)
                .bold()
        }
    }
}
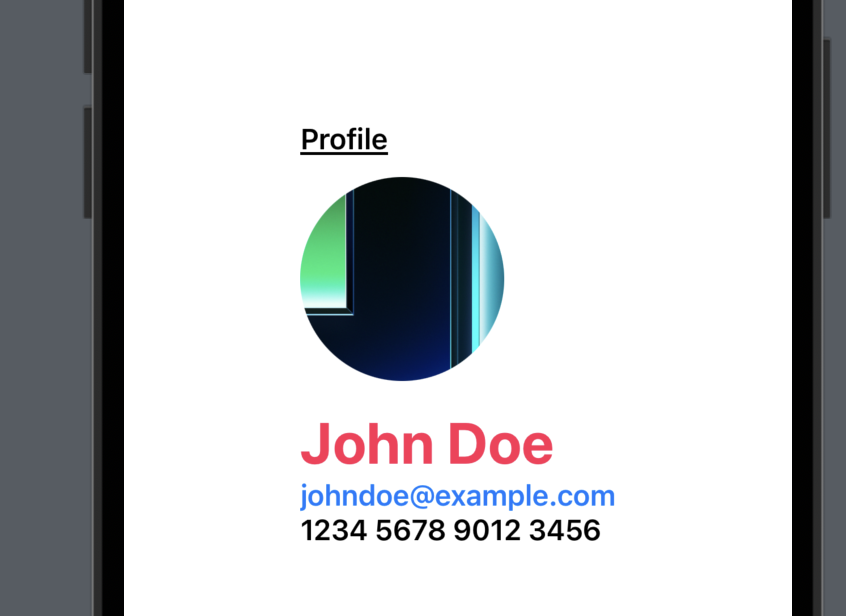
In this example, we have four Text views that display a view title, a name, an email address and a credit card number and one Image view as the profile image.
Now let’s add a modifier .redacted(reason: .placeholder) for the VStack.
        VStack(alignment: .leading) {
            // code from above
        }
        .redacted(reason: .placeholder)
When we observe the preview canvas, we’ll see that all contents are obscured with a rounded rectangle with the gray color or the foreground color applied to the view.
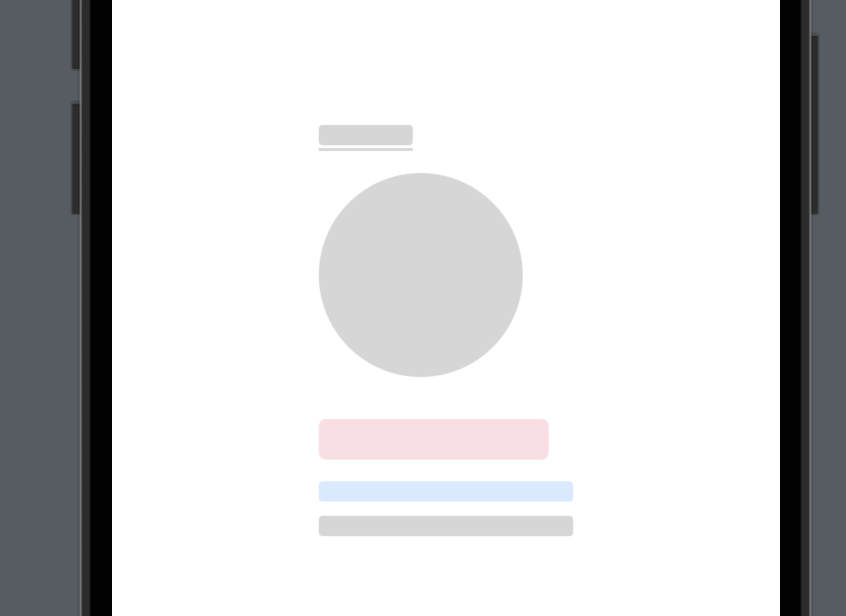
We’ve used the redacted() modifier on the VStack to specify that the content should be obscured. The value for the reason argument .placeholder: This reason is used for content that is being obscured to maintain the layout of the view. Another possible reason is .privacywhich is used for content that is sensitive and should not be shown to the user.
You may have noticed that the title for the view "Profile" is also redacted. In such a case where one or a few elements should not be redacted, we can simply add a .unredacted() modifier to the Text view of "Profile".
            Text("Profile")
                .underline()
                .bold()
                .unredacted()
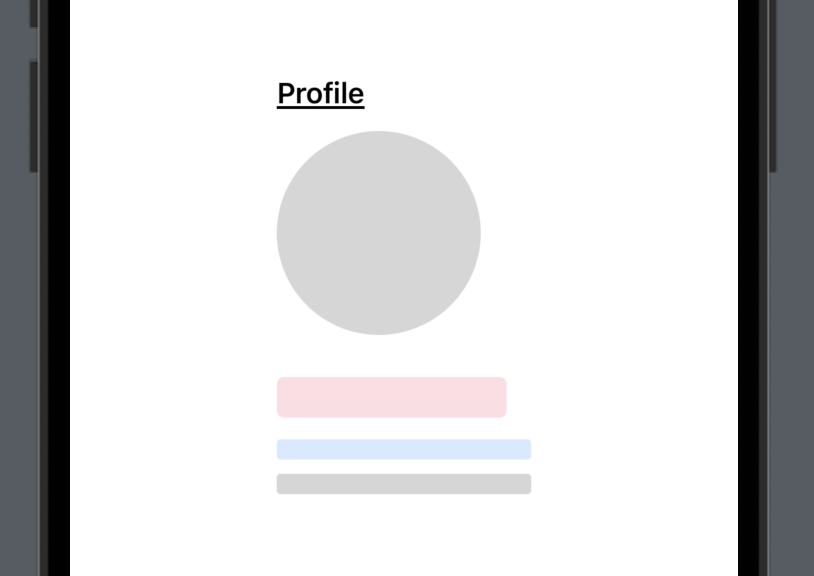
In the example above, we used the view modifier unredacted to explicitly "un-redact" the profile text view embedded in a redacted VStack.
Conclusion
Redaction is an important feature in SwiftUI that allows developers to obscure sensitive information in their apps. By using the redaction() modifier, we can easily specify which areas of a view should be redacted and for what reason. If you’re building an app that deals with sensitive information, be sure to use redaction to protect your users’ privacy.
That’s all of today’s post. I hope it helps and let me know if it is by leaving a comment. Don’t forget to subscribe to my newsletter if you’d like to receive posts like this via email.
I’ll see you in the next post!


