Navigation Toolbar Items in SwiftUI
Navigation Toolbar Item is a navigation bar item that is placed on the navigation bar of a view in SwiftUI. It can be used to display additional actions or controls related to the current view. Navigation Toolbar Item can be added to the navigation bar of a view using the toolbar modifier. In this blog post, we'll take a look at how to use Navigation Toolbar Item in SwiftUI.
The code of this post is available here.
Adding Navigation Toolbar Item
To add a Navigation Toolbar Item to a view, we need to use the toolbar modifier of the navigation bar. The toolbar modifier takes a ToolbarItemPlacement enum value that specifies the position of the item on the toolbar. There are several options available for the placement of the Navigation Toolbar Item. The most common options are .navigationBarLeading, .navigationBarTrailing, and .bottomBar.
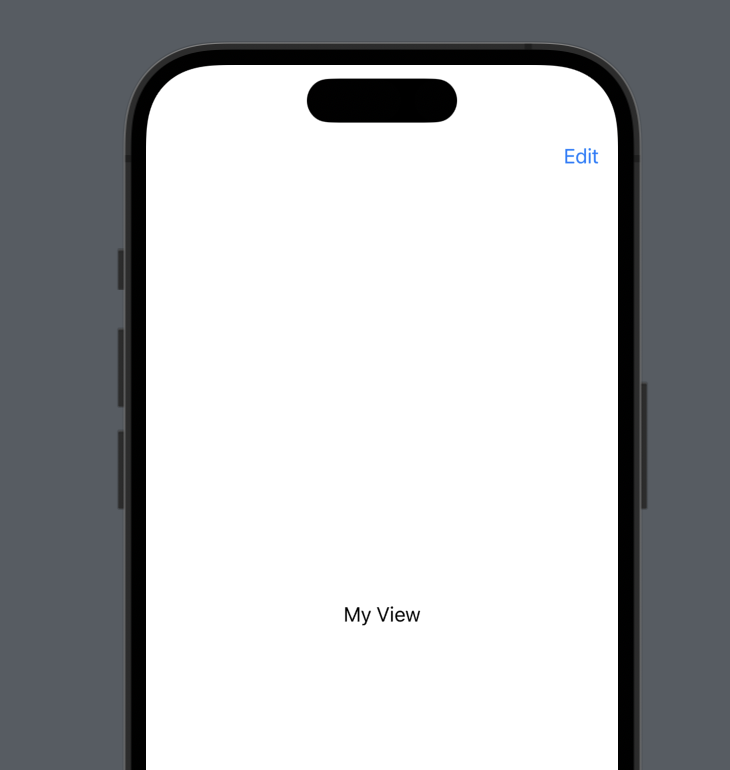
Here's an example of adding a Navigation Toolbar Item to the trailing side of the navigation bar:
struct ContentView: View {

    var body: some View {
        NavigationView {
            Text("My View")
                .toolbar {
                    ToolbarItem(placement: .navigationBarTrailing) {
                        Button("Edit") {
                            // Handle edit button tap
                        }
                    }
                }
        }
    }
}
In this example, we're adding a Button as the Navigation Toolbar Item with the label "Edit". When the user taps on the button, the closure provided to the Button's action parameter will be executed.
Multiple Toolbar Items
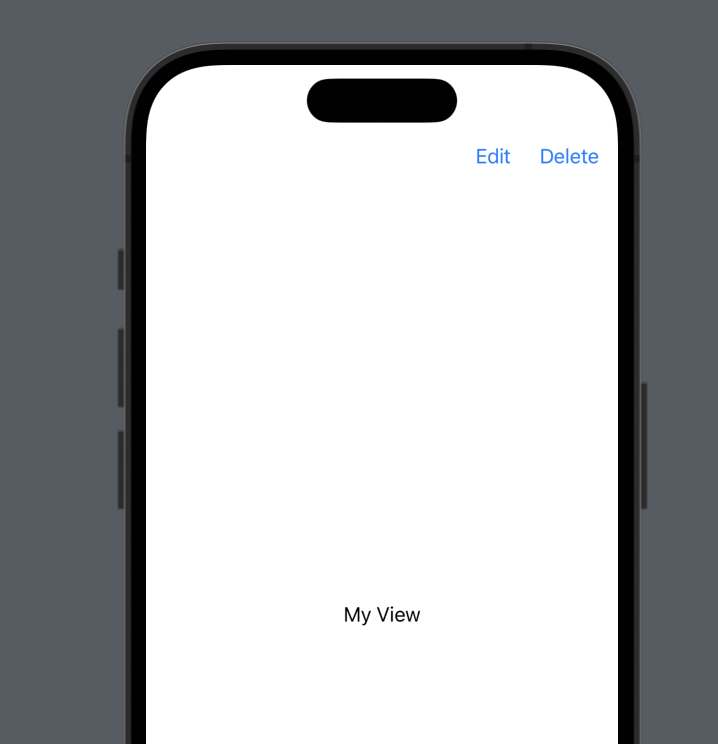
We can also add multiple Navigation Toolbar Items to the same view, as shown in the following example:
struct ContentView: View {
    var body: some View {
        NavigationView {
            Text("My View")
                .toolbar {
                    ToolbarItem(placement: .navigationBarTrailing) {
                        Button("Edit") {
                            // Handle edit button tap
                        }
                    }
                    ToolbarItem(placement: .navigationBarTrailing) {
                        Button("Delete") {
                            // Handle delete button tap
                        }
                    }
                }
        }
    }
}
In this example, we're adding two Navigation Toolbar Items to the trailing side of the navigation bar. The first item is an "Edit" Button, and the second item is a "Delete" Button.
Customization
Just like other views, we can also customize the appearance of a toolbar item.
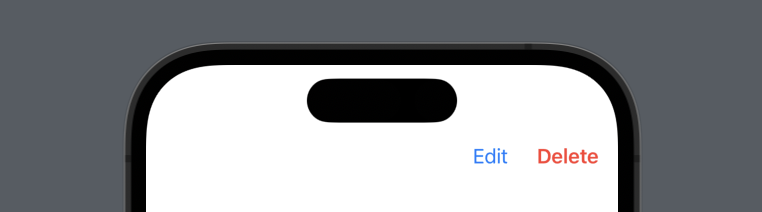
For instance, in the example above, let’s make the delete button label bolder and give it a red foreground color. To do this, we can simply add two modifiers to the button.
ToolbarItem(placement: .navigationBarTrailing) {
    Button("Delete") {
        // Handle delete button tap
    }
    .bold()
    .foregroundColor(.red)
}
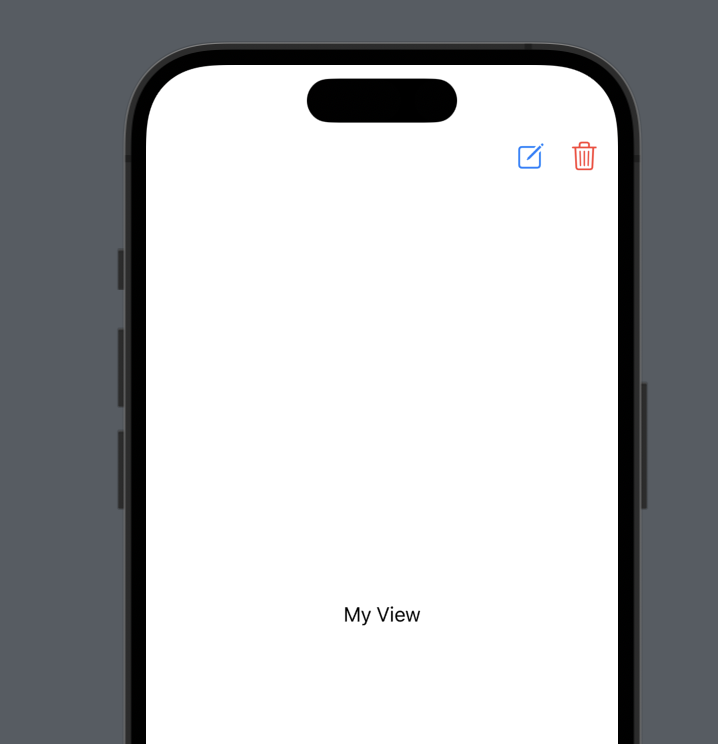
Now the delete button should look different, as shown in the screenshot below.
Work with any view
We can also use any view as a Navigation Toolbar Item. For example, we can use an HStack with two system images and a spacer as a Navigation Toolbar Item:
struct ContentView: View {
    var body: some View {
        NavigationView {
            Text("My View")
                .toolbar {
                    ToolbarItem(placement: .navigationBarTrailing) {
                        HStack {
                            Image(systemName: "square.and.pencil")
                                .foregroundColor(.accentColor)
                            Spacer()
                                .frame(width: 20)
                            Image(systemName: "trash")
                                .foregroundColor(.red)
                        }
                    }
                }
        }
    }
}
Conclusion
Navigation Toolbar Item is a useful tool in SwiftUI that allows us to add additional actions or controls related to the current view to the navigation bar. It can be customized to match the design of our app, and we can use any view as a Navigation Toolbar Item. With this knowledge, we can enhance the user experience of our SwiftUI apps by adding more functionality to the navigation bar.
That’s all of today’s post. I hope it helps and let me know if it is by leaving a comment. Don’t forget to subscribe to my newsletter if you’d like to receive posts like this via email.
I’ll see you in the next post!


