Links in SwiftUI
Hi all, today I’m going to demonstrate the two ways to add a link in your iOS app in SwiftUI. The first way is a general link, which will take the users to a webpage in Safari (or another browser set as default). The other way is a share link, which toggles a sheet for users to select a contact to send to or an app to save or send the link. Without further ado, let’s get coding.
The source code of this post is available here.
General Link that opens in a browser
Let’s first take a look at the context, which can be a common situation where a link to a website would be useful.
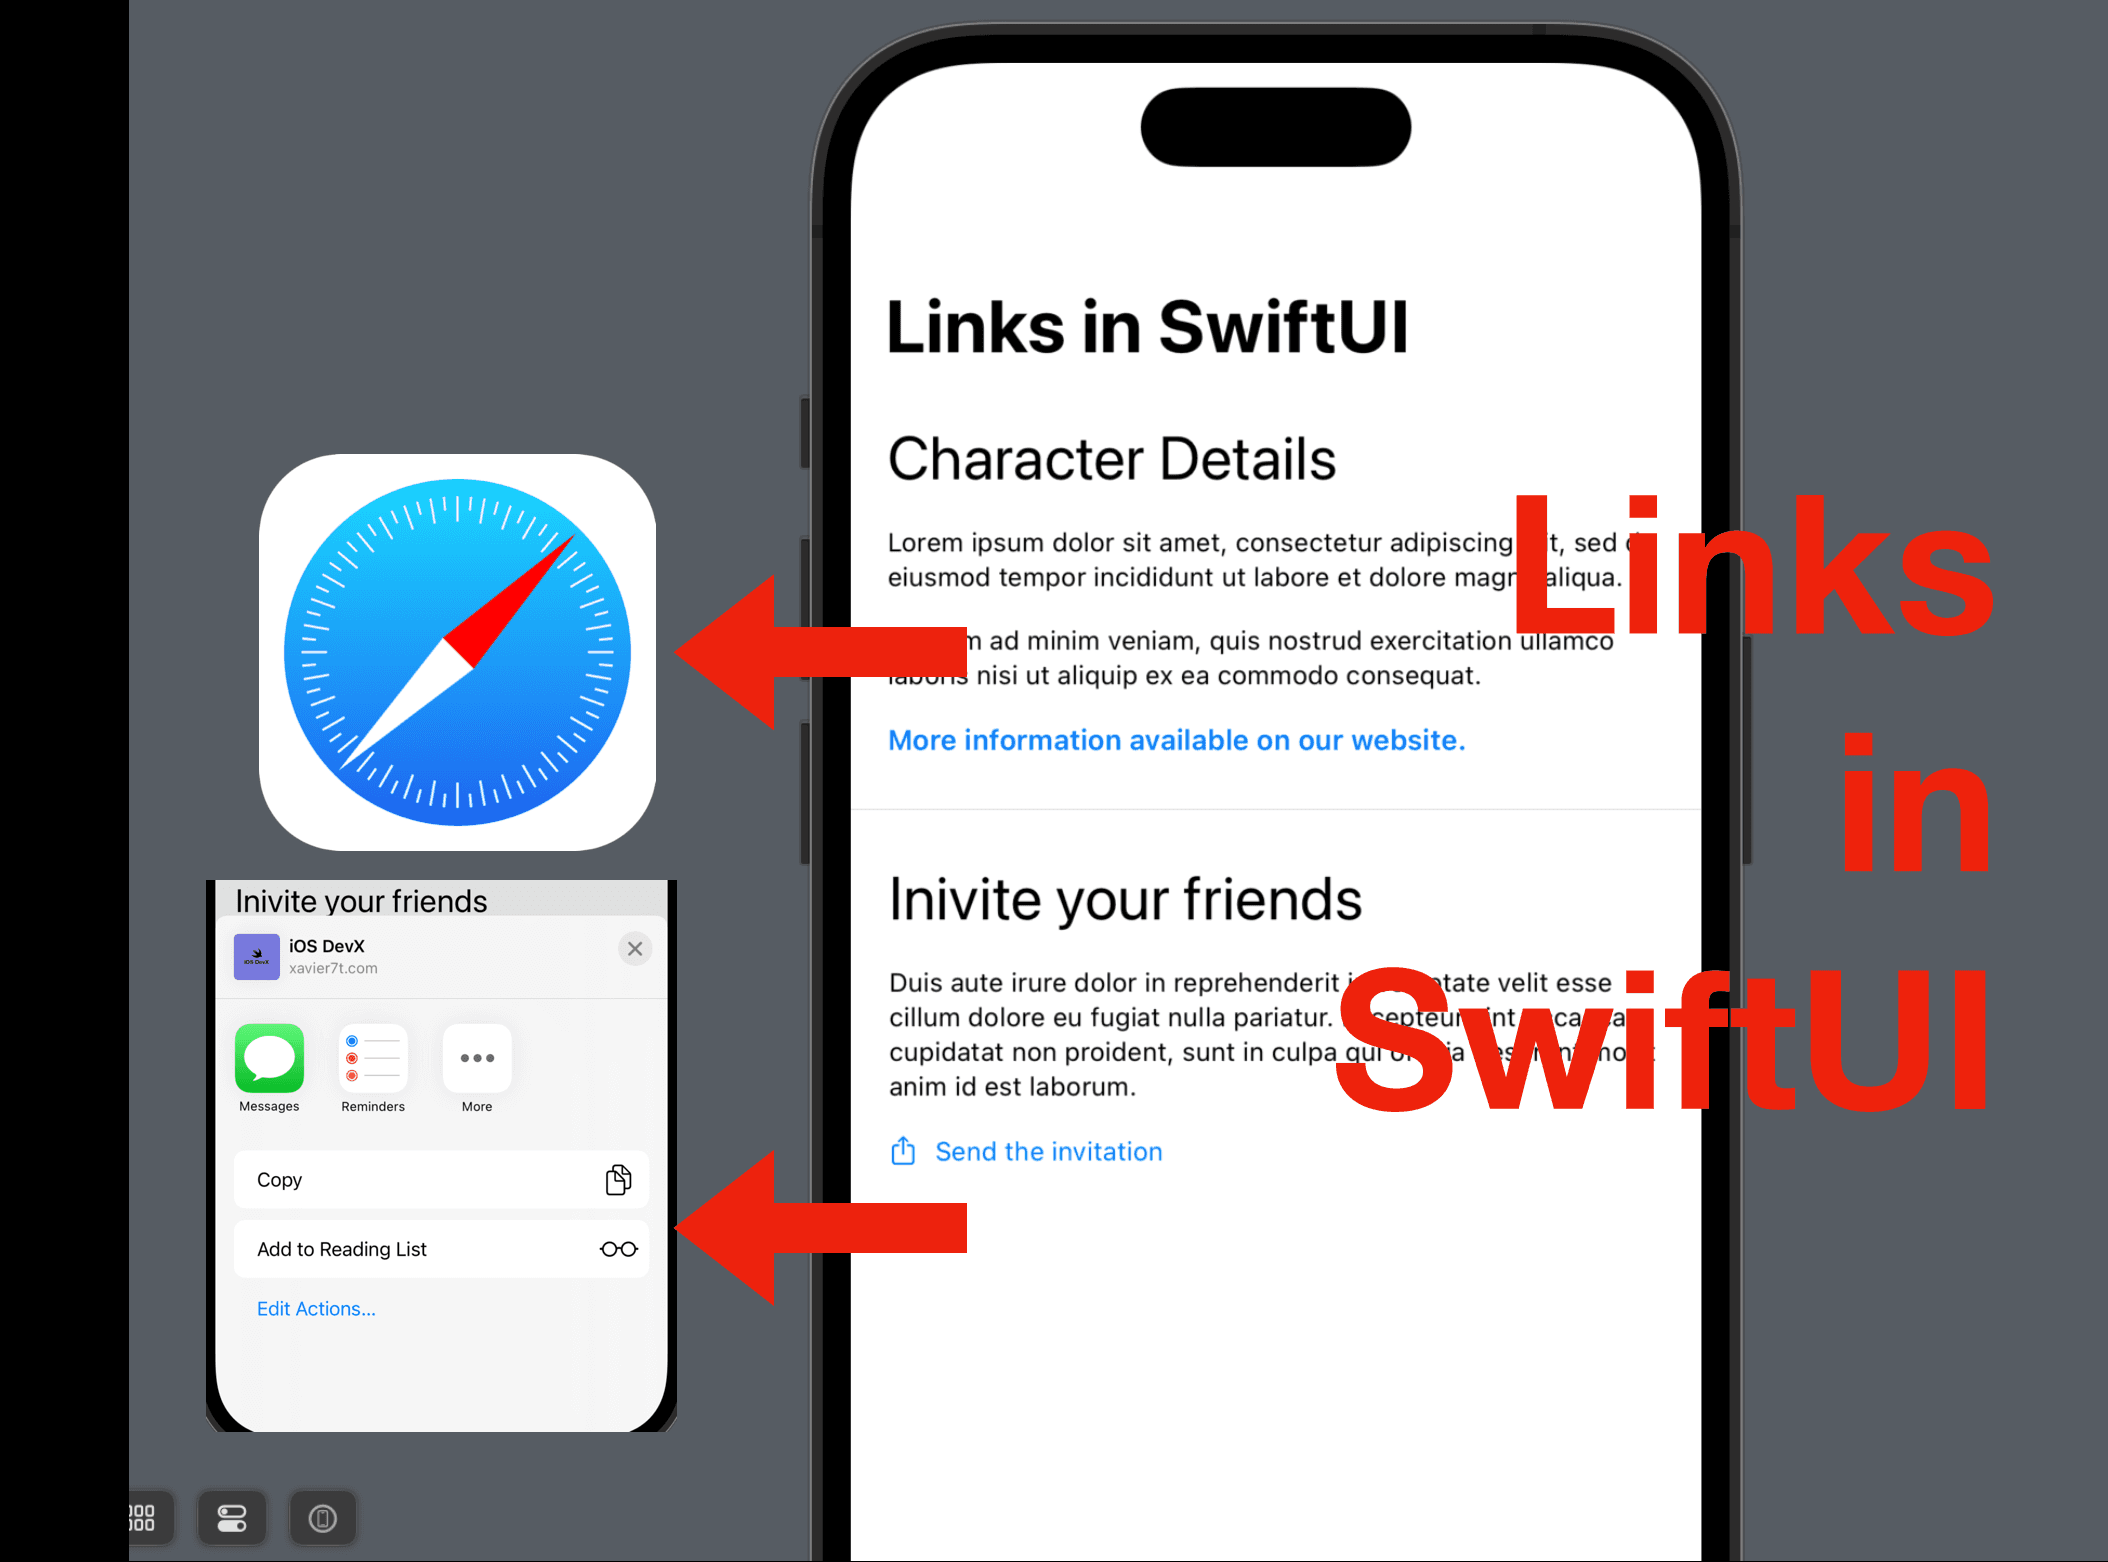
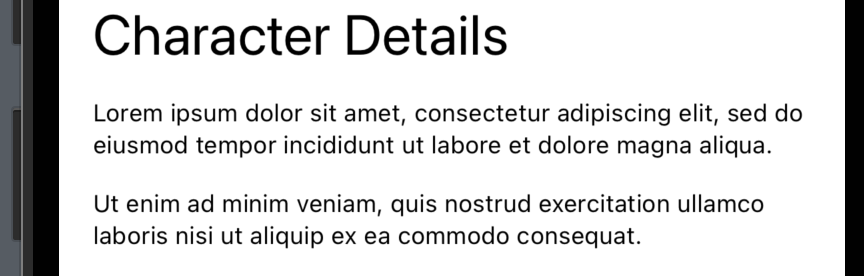
The code below presents a detailed description of a character in a game/of a product/ of a dish, etc. With a title and two descriptional texts, the screen already looks crowded. What’s worse, much more information is not included yet, and can be important to users.
VStack(alignment: .leading, spacing: 15) {
    Text("Character Details")
        .font(.title)
    Text("Lorem ipsum dolor sit amet, consectetur adipiscing elit, sed do eiusmod tempor incididunt ut labore et dolore magna aliqua.")
    Text("Ut enim ad minim veniam, quis nostrud exercitation ullamco laboris nisi ut aliquip ex ea commodo consequat.")
}
.font(.caption)
.padding()
In this case, we can use a Link element to provide the users with a website URL, where such information can be found.
So below the last text, we can add a Link as the code below.
Link("More information available on our website.",
      destination: URL(string: "https://xavier7t.com")!)

There are several ways to initialize a link, but typically it needs:
a string or a label view to be presented on the screen
a URL as the destination of the link.
Note 1: if a link is initialized with a string instead of a label view, we can still style the link by adding modifiers directly to the link element.
Say we need to have a footnote font and a bolder font style applied to the link label, we can just add these modifiers like the code below.
Link("More information available on our website.",
      destination: URL(string: "https://xavier7t.com")!)
.font(.footnote)
.bold()

This link looks bolder and is in footnote font now.
Note 2: Remember that the destination is a URL, not a string. So if you have the string, make it a URL with URL(string: "yourwebsite.com")! . (Maybe provide a default value instead of force unwrap the optional URL).
ShareLink
Sometimes, our app might need to include a link, that is not designed to open directly. Such a case might be a link
for the user to copy-and-paste for a note
to be added to the reading list in Safari
to invite others to use the app or visit a website
to be opened in a non-browser app
and more
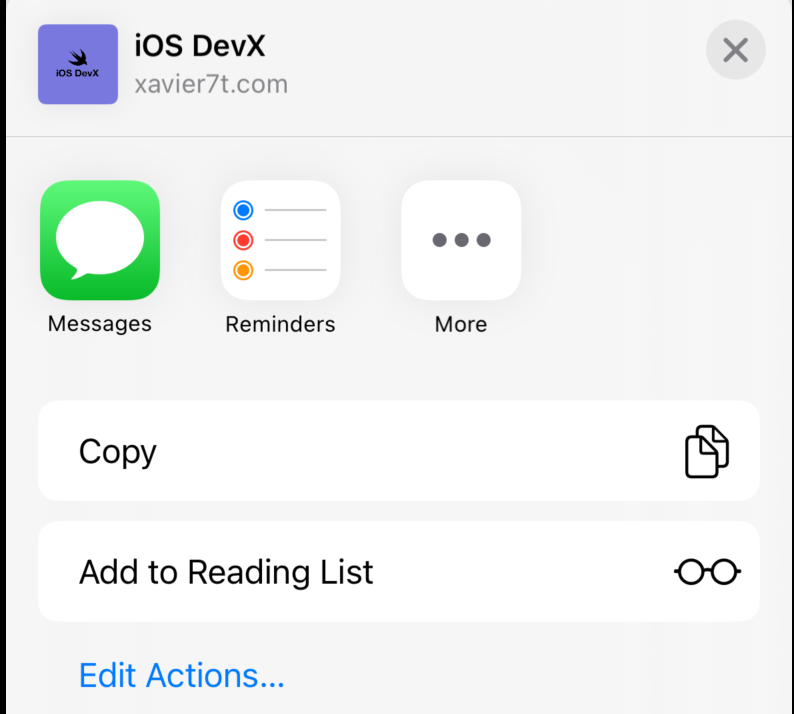
All these case would NOT need to open the website directly. Hence we can use a ShareLink element, to present a sheet, where the users can select a preferred way to consume the link destination.
Below is a sample ShareLink and let’s see how it’s initialized.
item: Data. This can be a URL and other types that can be represented by Data.
label: Label view. This is the link is presented. Please note that you can use
.labelStyleto control the label components to be presented, ie. text only/ icon only/both.
ShareLink(item: URL(string: "https://xavier7t.com")!) {
    Label("Send the invitation", systemImage: "square.and.arrow.up")
        .labelStyle(.titleAndIcon)
        .font(.footnote)
        .bold()
}
If needed, you can also create a share link with two more parameters: subject and message. Both are text view and optional.
The screenshot below shows how the code above looks like:

When you tap on the link, you should be able to see the sheet for methods of sharing getting presented.
Well, that’s all about links in SwiftUI. I hope this is helpful!
Remember to subscribe to my newsletter and leave a comment if you have any questions. I’ll see you in the next post.


