In iOS 14 and macOS 11, Apple introduced LazyVStack and LazyHStack in SwiftUI. Both types of the stack is a SwiftUI but how do they differ from the traditional VStack and HStack? We’re going to explore this in Xcode with a simple view struct.
The source code of this post is available here.
Overview
This demo will use a view with a ScrollView with a VStack containing a list of texts. We’ll first use a traditional VStack and then change it to a Lazy VStack; by comparing the differences in the debug console with some print statements, we can tell how the Lazy stacks work and how they differ from the traditional stacks.
Traditional VStack
First let’s build up a list of texts inside a VStack, in a traditional way.
Step 1. Create a new SwiftUI project.
Step 2. Open the default ContentView.
Step 3. Update the body property. Replace the default contents with a VStack inside a ScrollView.
struct ContentView: View {
    var body: some View {
        ScrollView {
            VStack {
                //...
            }
        }
    }
}
Step 4. Inside the VStack, let’s add a ForEach element containing 150 rows. Each row has the text "Row" followed by the row index.
struct ContentView: View {
    var body: some View {
        ScrollView {
            VStack {
                ForEach(0...149, id: \.self) { i in
                    Text("Row \(i)")
                }
            }
        }
    }
}
Step 5(Optional). Put the text inside an HStack with padding, and add a Spacer after the text. This step is for easier scrolling.
Step 6. You can see the rows showing up in the preview after Step 4 or Step 5. Now, let’s add a .onAppear modifier and print a message with the row index and current time (using Date()).
HStack {
    Text("Row \(i)")
    Spacer()
}
.padding(20)
.onAppear {
    print("Row \(i) on appear", Date())
}
Step 7. Run the app in the simulator and monitor the debug console.

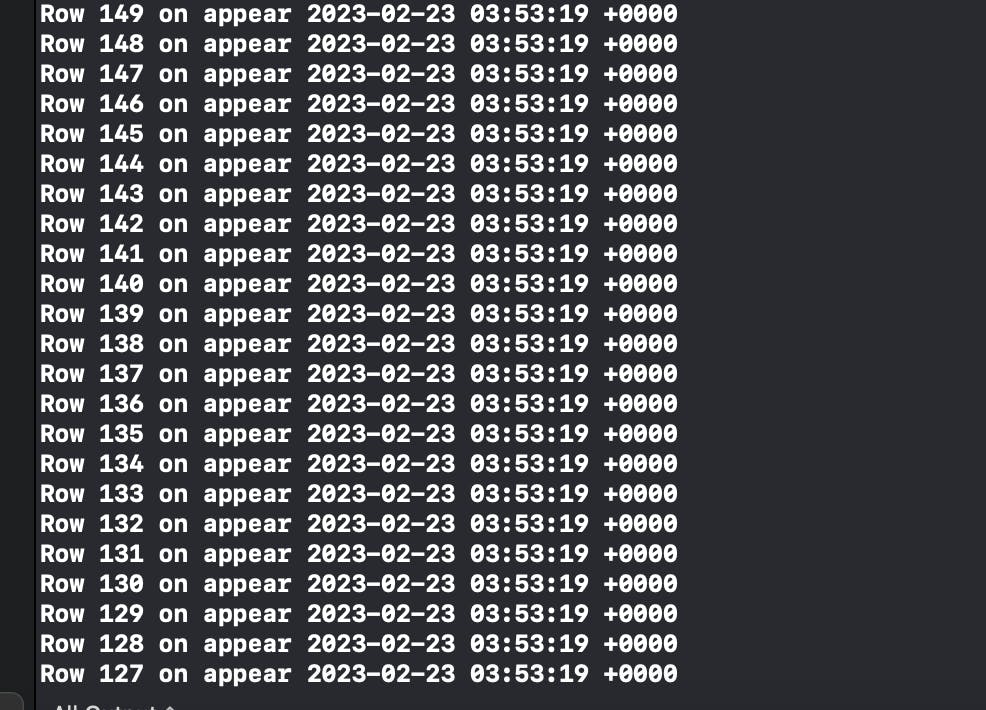
You might have noticed that all the elements are initialized, almost at the same time, when the content view appears, even if most of them are not even shown to the user. A VStack with a few amount of elements might work just fine, but what if we need to work with a large number of elements to be shown? The elements don’t have to get initialized until the user scrolls down to a place near them right? That’s when it comes to the LazyVStack.
LazyVStack
Step 1. To see how LazyVStack works, we don’t need much changes. Just simply replace VStack inside the ScrollView with a LazyVStack.
struct ContentView: View {
    var body: some View {
        ScrollView {
            LazyVStack {
                ForEach(0...149, id: \.self) { i in
                    HStack {
                        Text("Row \(i)")
                        Spacer()
                    }
                    .padding(20)
                    .onAppear {
                        print("Row \(i) on appear", Date())
                    }
                }
            }
        }
    }
}
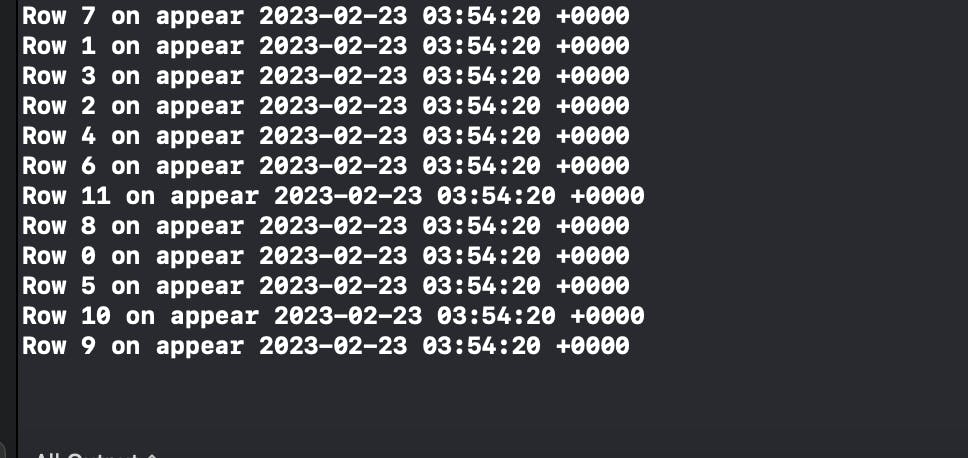
Step 2. Now run the app again. This time, only a few elements are initialized and these are the elements showing up on the simulator screen.

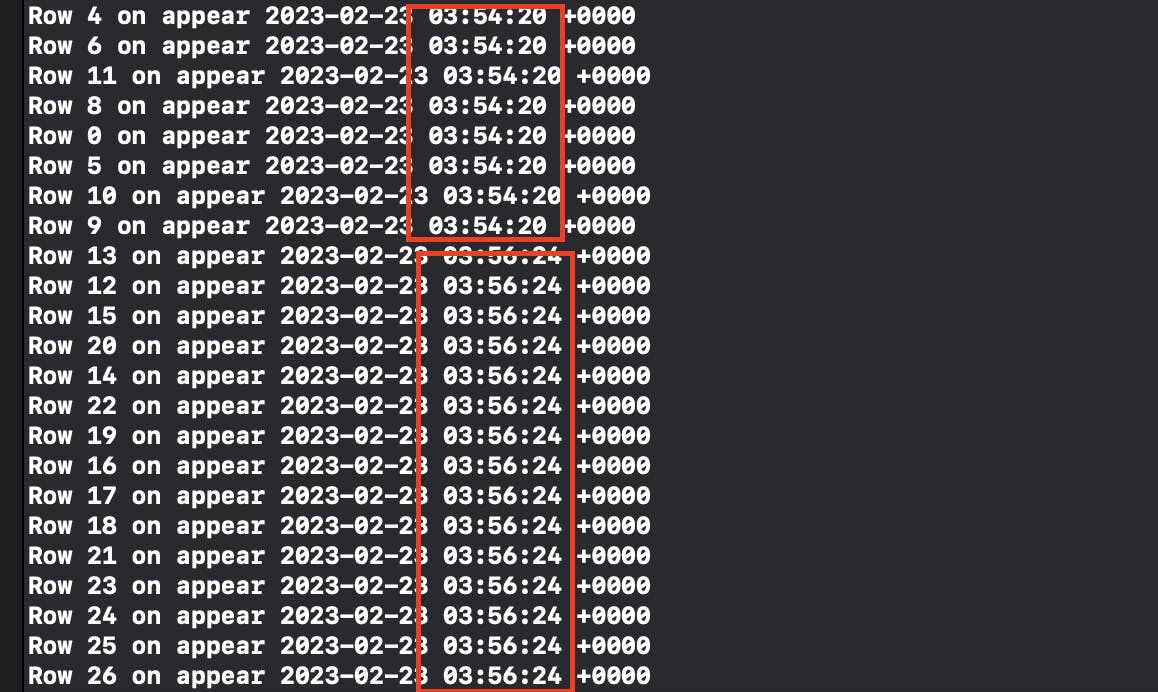
Step 3. Now scroll down in the simulator. And more elements are showing up. You can see that there’s a time interval between two groups of messages being printed, also indicating the elements in a Lazy stack will get initialized when it’s needed by the view.

That’s all about LazyVStack (and LazyHStack works similarly). In short, while presenting data of a large size, it’s better to use lazy stacks to reduce the number of views being initialized at the same time.
Hope this post helps and remember to subscribe to my newsletter if you’d like to get posts like this via email. See you all in the next post!

