CRUD with Core Data in SwiftUI
Create a note-taking app using Core Data
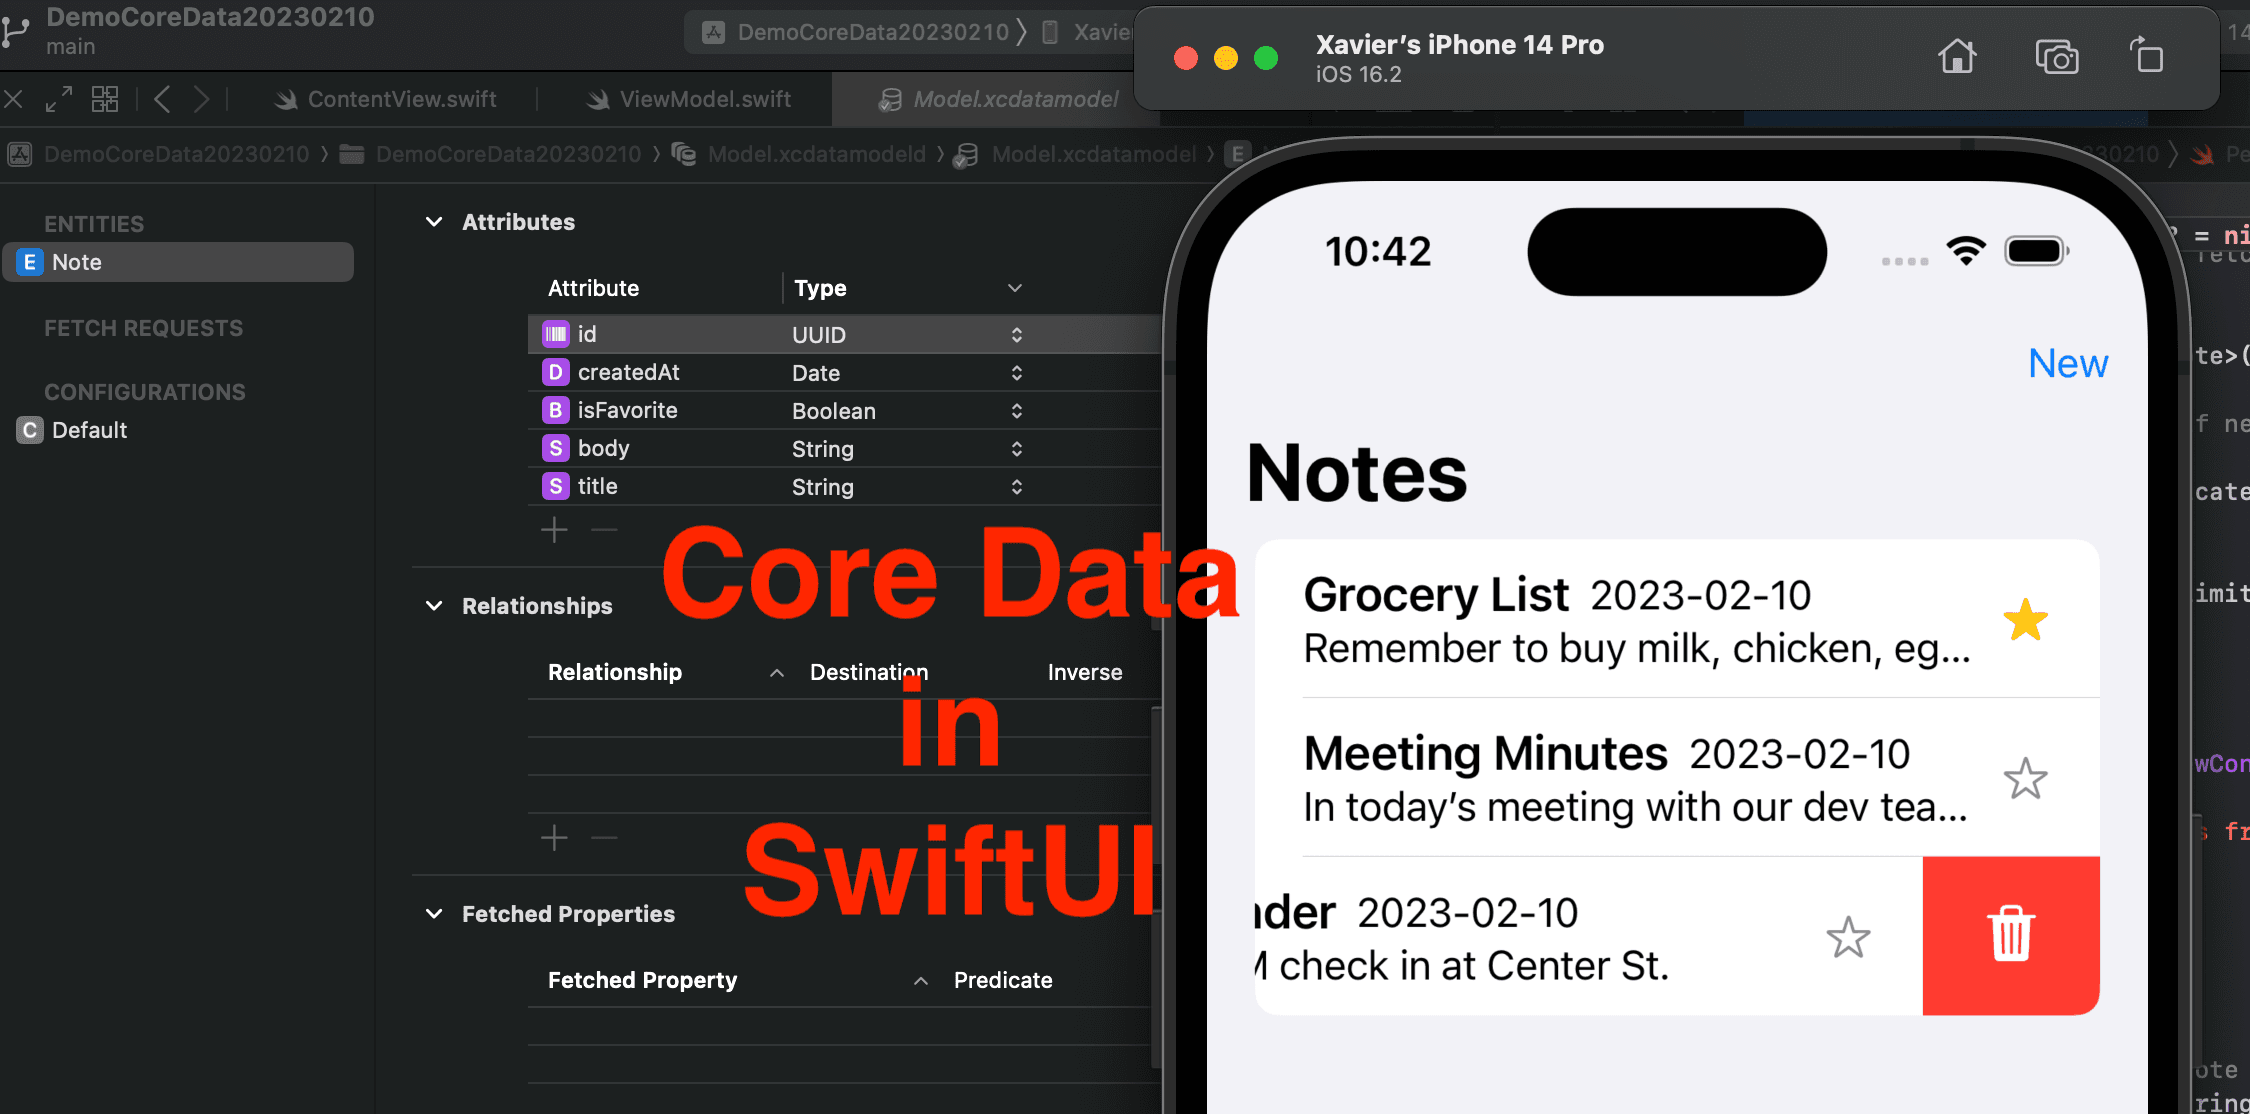
Core Data is often considered the default way when it comes to data persistence or caches. Today we’ll look at how to CRUD (create, read, update and delete) records with Core Data in SwiftUI. We’re going to create a simple app for users to take notes. Let’s get excited!
The source code of this post is available here.
Step 0 - App Overview
The app we’re going to make today has one main screen, with the following components:
a list of all notes the users have taken;
a button to create new notes.
Each note will have (the properties below):
an ID,
a timestamp to represent the time created,
a text title,
a text body, and
a tag to indicate if it’s marked as a favorite.
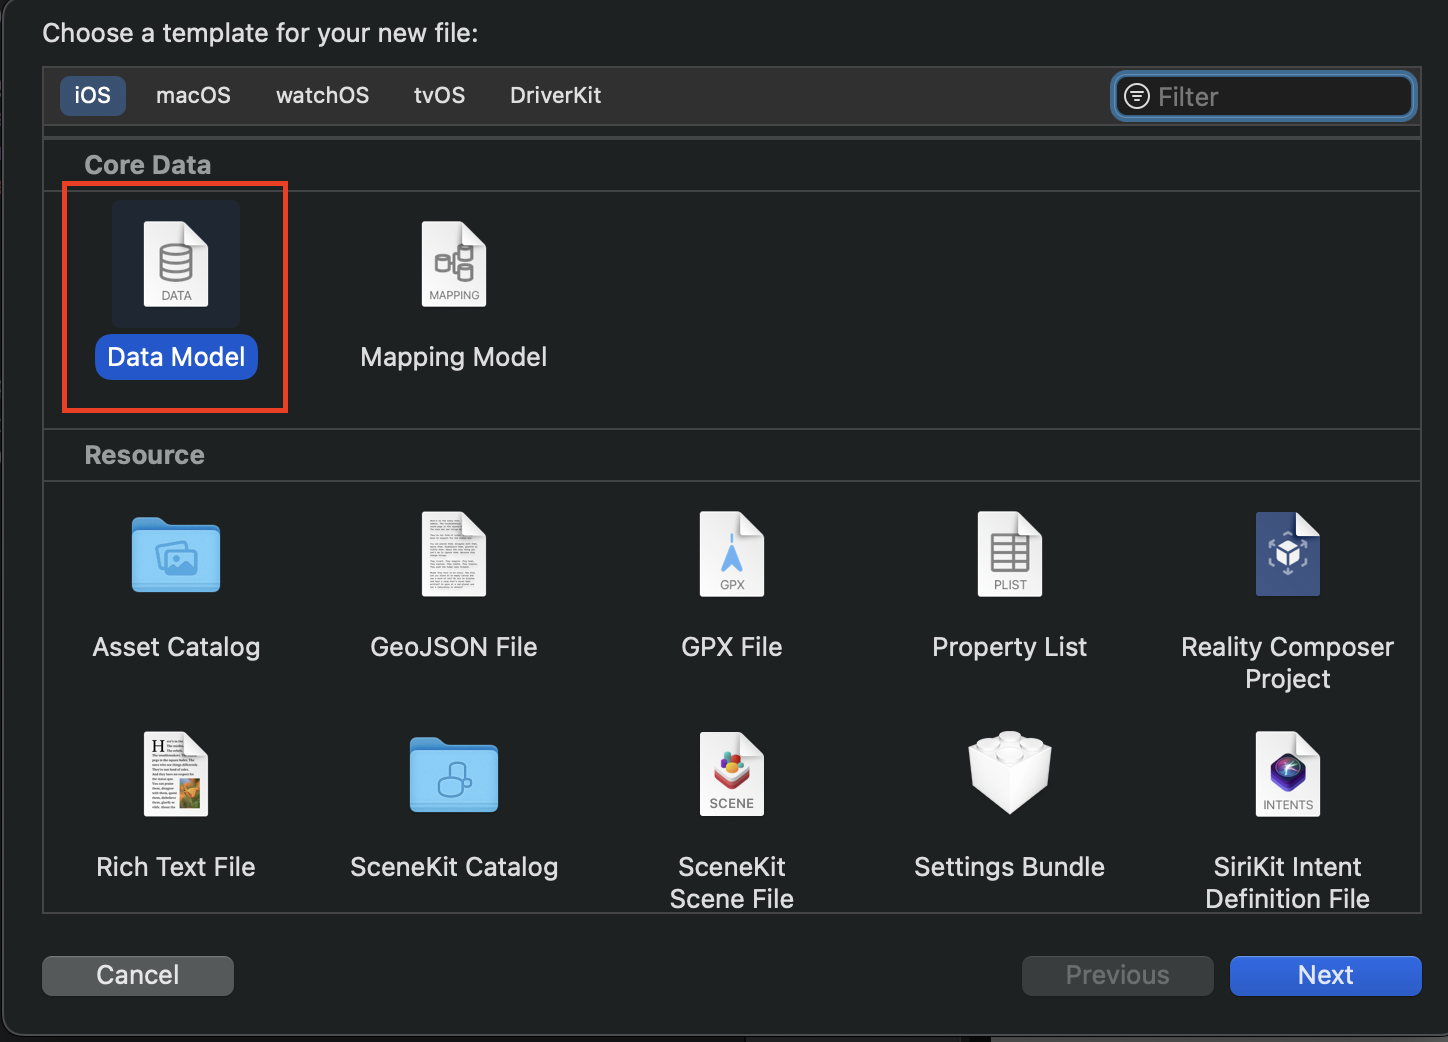
Step 1 - Add Core Data Model File
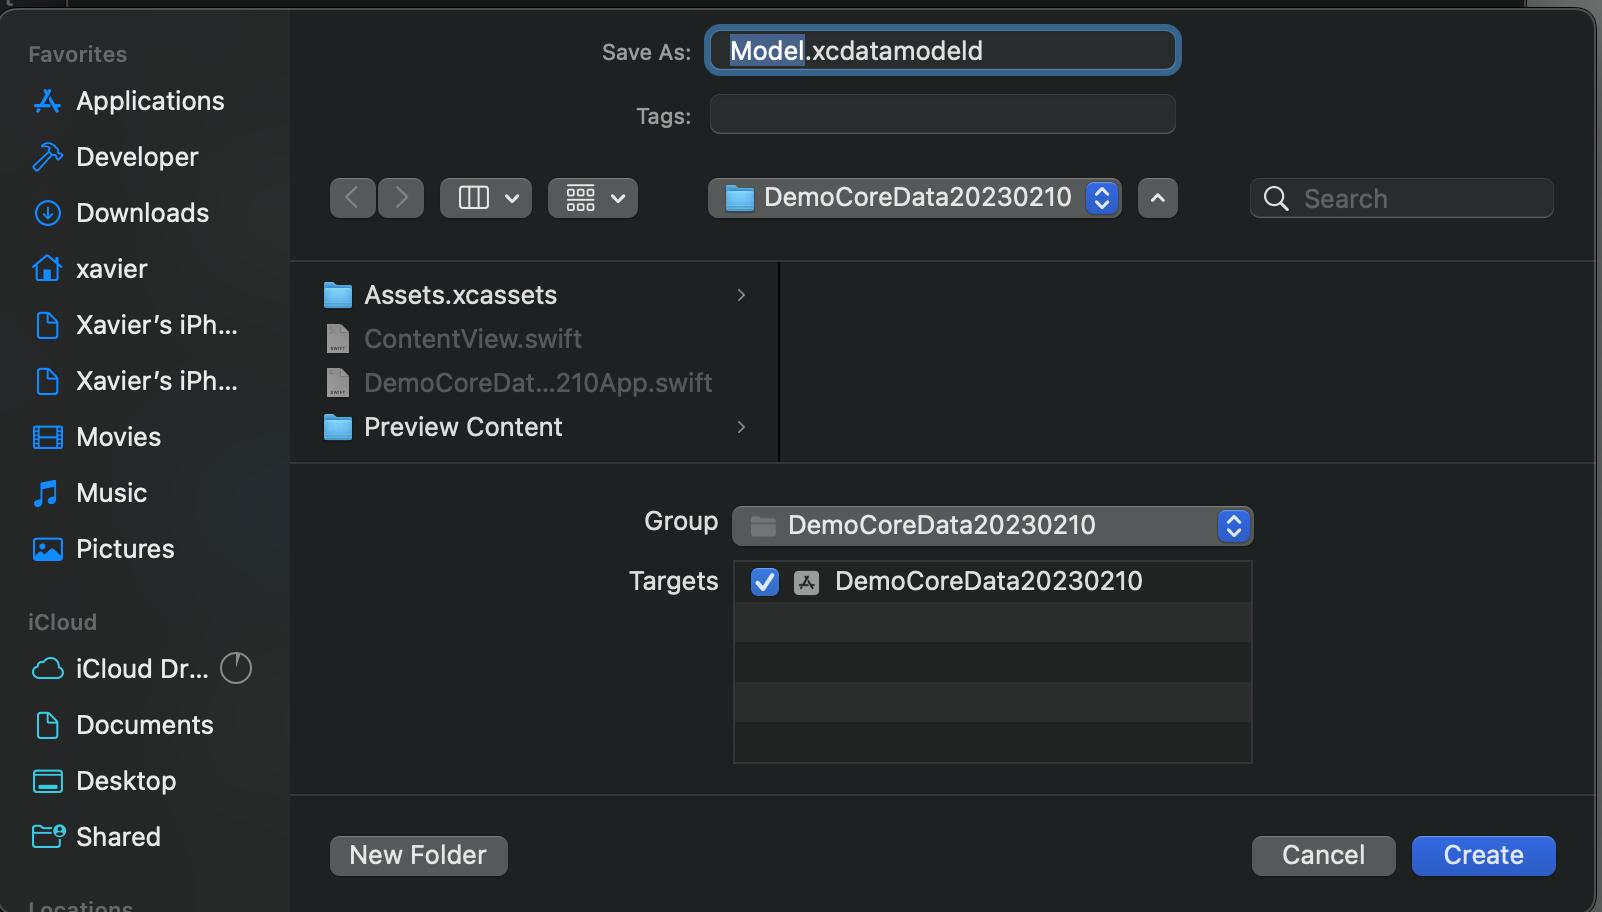
Create a new project and add a new file. The file template should be Data Model in the Core Data section. Press Next and saved the file. Remember the file name as we’ll use it later in our code. In this demo, the data model file is called "Model".
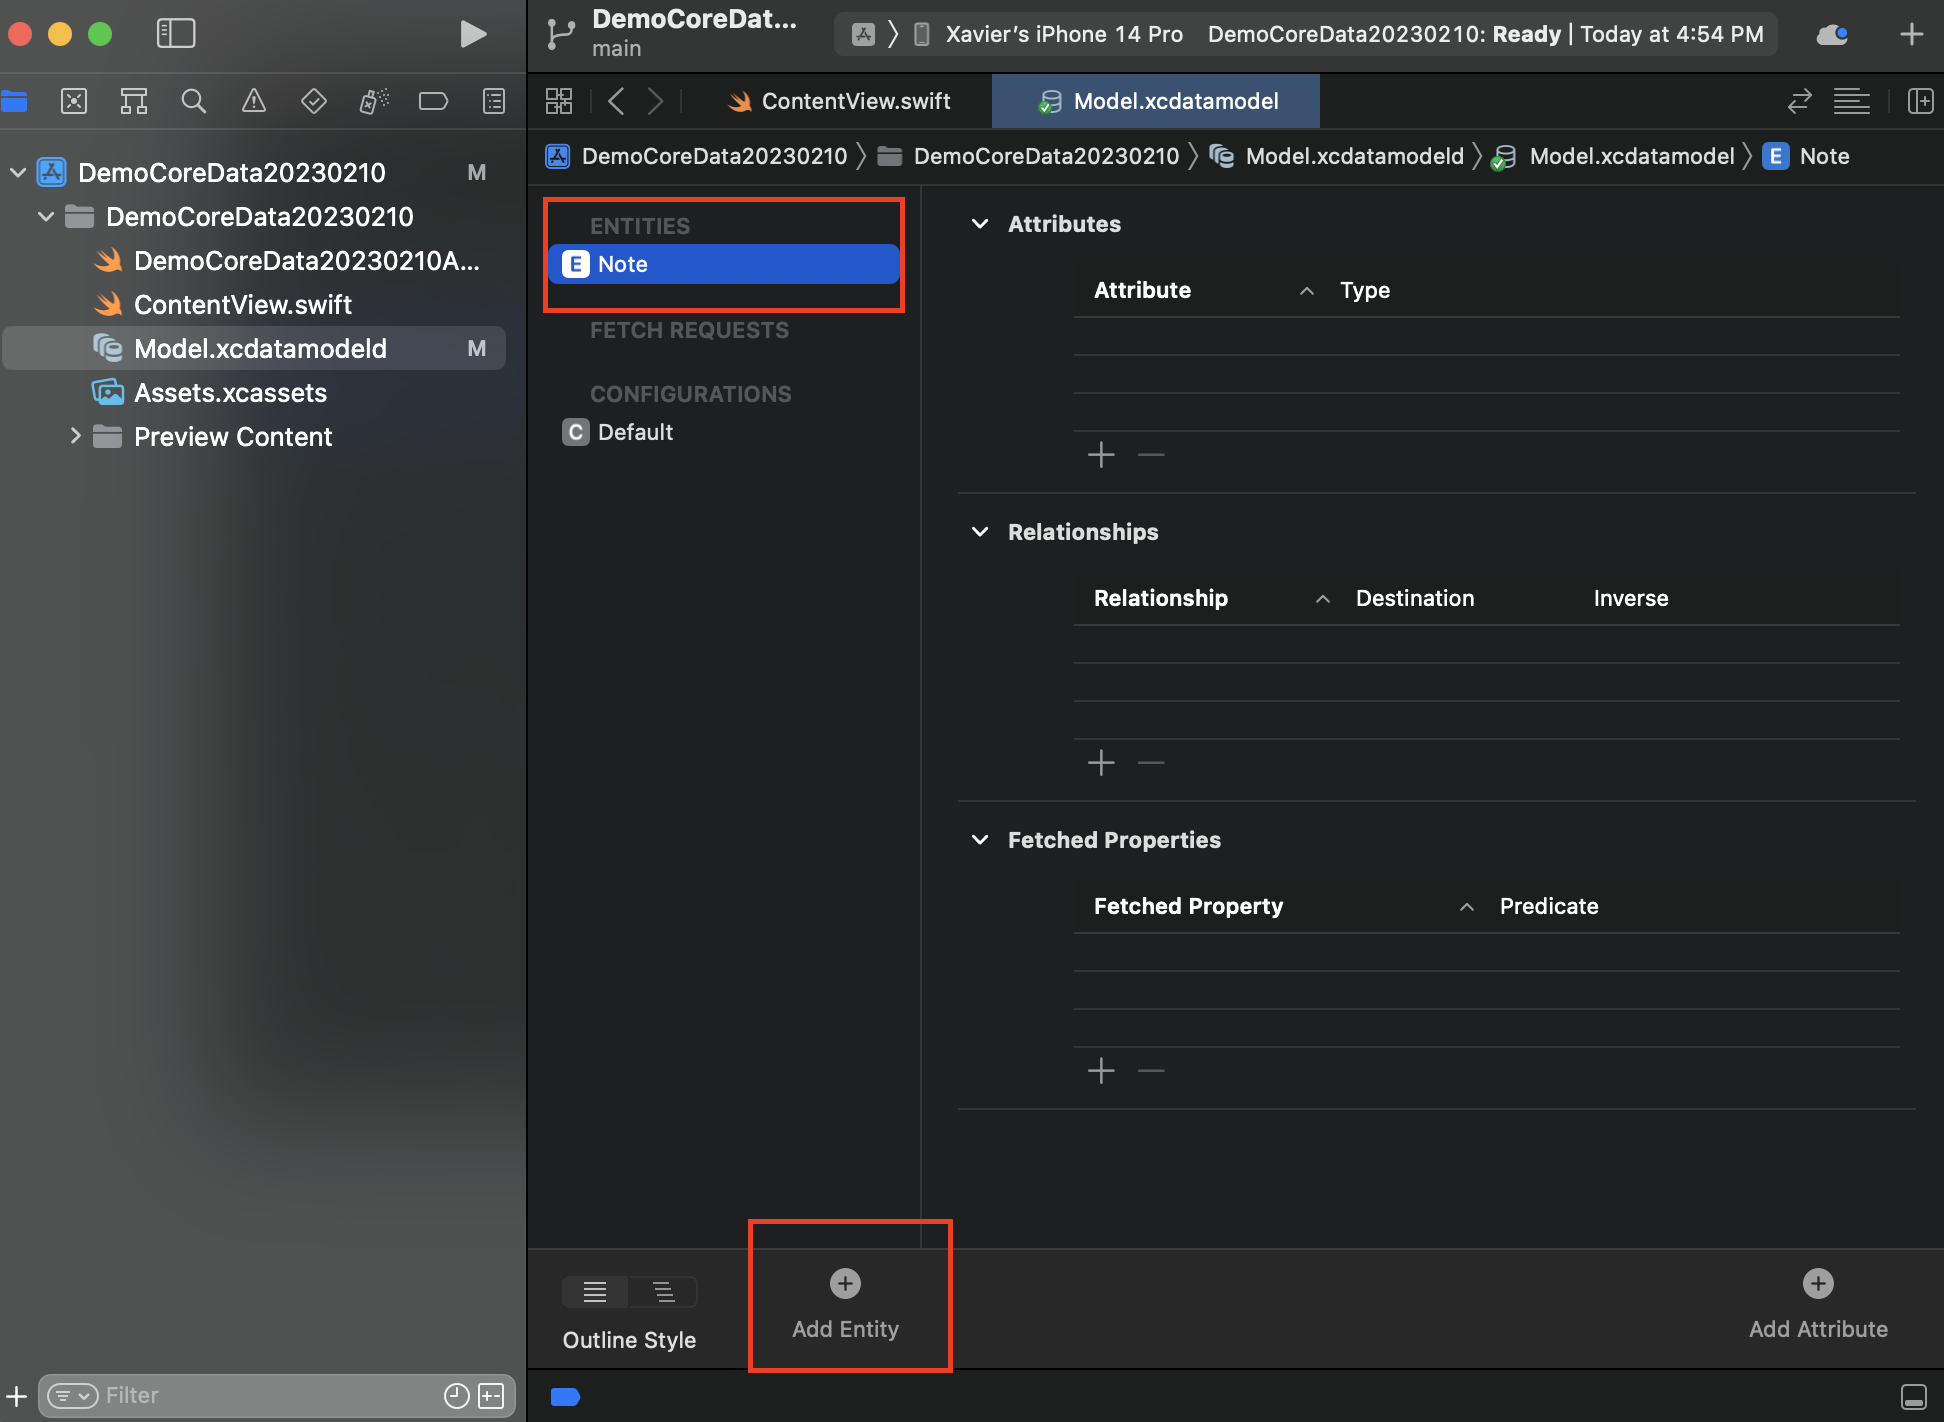
Step 2 - Add the Note entity to the data model file
Tap "Model.xcdatamodeld" to open the model file. Press "Add Entity" at the bottom of your screen. A new entity called "Entity" will be added. Tap its name and press "Tab" key and rename it to "Note".
This step is like creating a struct or class for the Note model. What’s different here is that Xcode automatically creates a Note class for us and makes it inherited from NSManagedObject class.
//!DON’T ADD THIS CODE. It’s done by Xcode already
//Xcode adds this class in the background automatically once you create the entity
public class Note: NSManagedObject {
}
Step 3 - Add attributes to the entity
An "attribute" is basically a property of our entity. When you add an attribute in the data model file, you add a property to the Note class.
Remember our notes will have an ID, a timestamp, a title, a body and a favorite tag? Now let’s add these as the attributes of the Note entity.
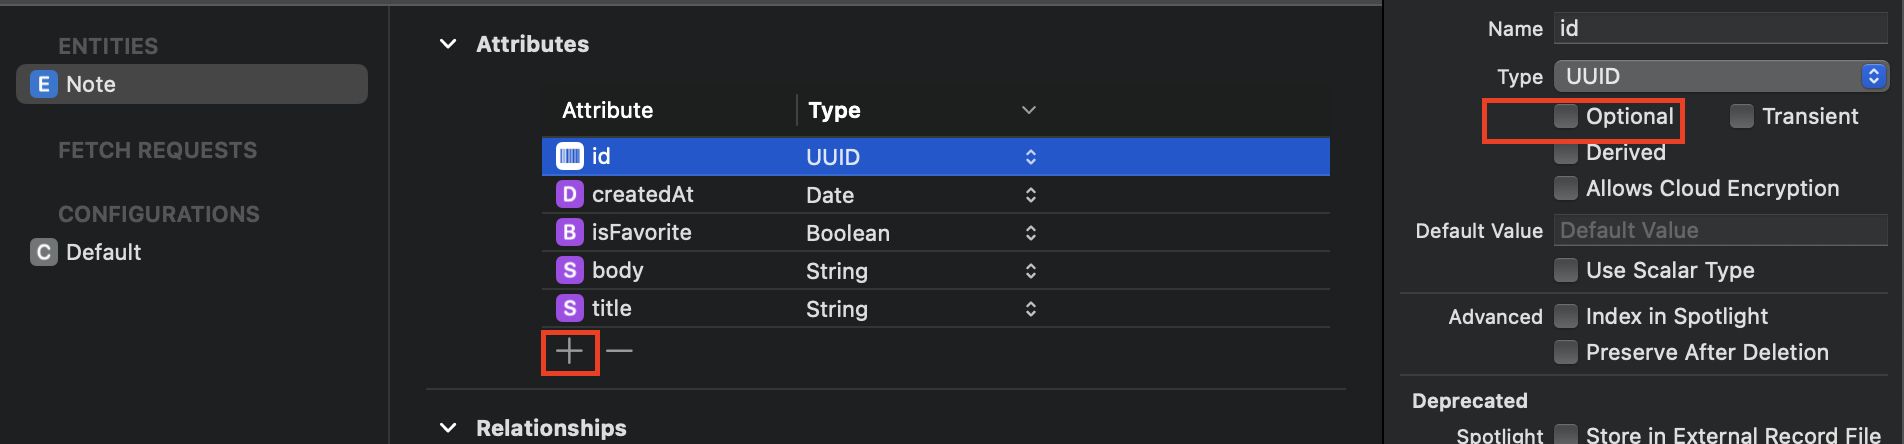
Press "+" in the Attributes to add an attribute. The attributes we need are below, enter the attribute name and select the type. Select an attribute and uncheck the "Optional" from the inspector area, since all the properties are required for our notes.
| Attribute Name | Type | Optional | Description |
| id | UUID | No | Note ID |
| createdAt | Date | No | Timestamp |
| isFavorite | Boolean | No | Favorite tag |
| title | String | No | Note title |
| body | String | No | Note body |
Step 4 - Create a Persitence Controller class
This step is to create a new class PersistenceController. This class will act like our data service. All the CRUD functions are defined here and we can call these functions in the view model.
Before creating this class, import CoreData first. Then declare a static instance of PersistenceController , so that when you need to functions in this class, you can use PersistenceController.shared instead of creating new instances every time.
Then declare a container variable of the type NSPersistentContainer , which is a class from CoreData that provides properties and functions to work with Core Data. PS: to init your NSPersistentContainer you should pass the data model name you chose in Step 1 (ie. "Model" in this demo) to the name parameter.
Call the .loadPersistentStores function to "activate" core data when the controller initializes and catch the error if there’s any.
import CoreData
class PersistenceController {
    static let shared = PersistenceController()
    let container: NSPersistentContainer

    init() {
        container = NSPersistentContainer(name: "Model") // update the name if you’re using a different data model file name
        container.loadPersistentStores { storeDescription, error in
            if let error {
                print("Could not load Core Data persistence stores.", error.localizedDescription)
            }
        }
    }
}
For debug runs, SwiftUI previews, tests etc, we don’t want to save or changes data in the production environment. Therefore, we can add a boolean parameter in the initializer to tell if the changes being made should be in memory only and set the file path for the data persistence to /dev/null when the boolean value is true. In the SwiftUI Preview, we can create an instance of the controller with PersistenceController(inMemory: true) so no production will be affected. The updated init is as below:
//Updated initializer of PersistenceController classs
init(inMemory: Bool = false) {
    container = NSPersistentContainer(name: "Model")

    if inMemory {
        container.persistentStoreDescriptions.first?.url = URL(fileURLWithPath: "/dev/null")
    }

    container.loadPersistentStores { description, error in
        if let error {
            print("Could not load Core Data persistence stores.", error.localizedDescription)
            fatalError()
        }
    }
}
Step 5 - Define a function to save changes through Core Data
Whenever we made a change we need to have it saved. So let’s define a function saveChanges in PersistenceController to make it reusable in our CRUD functions coming in the next part.
context.hasChanges will return a boolean value telling us if any changes are made. So we can use it to call the save function only when needed.
func saveChanges() {
    let context = container.viewContext

    if context.hasChanges {
        do {
            try context.save()
        } catch {
            print("Could not save changes to Core Data.", error.localizedDescription)
        }
    }
}
Step 6 - CRUD functions
Now let’s define the functions to read or make changes to the database.
Create
The ID and createdAt timestamp can be populated by code. Title, body and isFavorite will need an input value so they should be the parameters.
In this function, we created an instance of Note, updated its properties (attributes) and called the function from Step 5 to save the changes.
func create(title: String, body: String, isFavorite: Bool) {
    // create a NSManagedObject, will be saved to DB later
    let entity = Note(context: container.viewContext)
    // attach value to the entity’s attributes
    entity.id = UUID()
    entity.title = title
    entity.body = title
    entity.isFavorite = isFavorite
    entity.createdAt = Date()
    // save changes to DB
    saveChanges()
}
Read
The read function has two optional parameters: predicateFormat is a string that represents your fetching criteria. If you need to fetch a note with the title "Grocery List", you can pass "title == 'Grocery List'" . fetchLimit means how many records you need to fetch. If you don’t pass these two values, all records will be fetched.
// function to fetch notes from DB
func read(predicateFormat: String? = nil, fetchLimit: Int? = nil) -> [Note] {
    // create a temp array to save fetched notes
    var results: [Note] = []
    // initialize the fetch request
    let request = NSFetchRequest<Note>(entityName: "Note")

    // define filter and/or limit if needed
    if predicateFormat != nil {
        request.predicate = NSPredicate(format: predicateFormat!)
    }
    if fetchLimit != nil {
        request.fetchLimit = fetchLimit!
    }

    // fetch with the request
    do {
        results = try container.viewContext.fetch(request)
    } catch {
        print("Could not fetch notes from Core Data.")
    }

    // return results
    return results
}
Update
For this app, we need to allow the user to change any or all of the note’s title, body and isFavorite. Therefore, let’s make them optional parameters of our update function.
This function checks if a value is passed in, if yes, the respective attribute of the entity is updated and then saved.
func update(entity: Note, title: String? = nil, body: String? = nil, isFavorite: Bool? = nil) {
    // create a temp var to tell if an attribute is changed
    var hasChanges: Bool = false

    // update the attributes if a value is passed into the function
    if title != nil {
        entity.title = title!
        hasChanges = true
    }
    if body != nil {
        entity.body = body!
        hasChanges = true
    }
    if isFavorite != nil {
        entity.isFavorite = isFavorite!
        hasChanges = true
    }

    // save changes if any
    if hasChanges {
        saveChanges()
    }
}
Delete
The delete function is simpler - we called the delete function in the container view context and then save the changes.
// function to delete a note
func delete(_ entity: Note) {
    container.viewContext.delete(entity)
    saveChanges()
}
Step 7 - View Model
Now we’re ready to build our view model.
In our view model, we have the following properties and functions:
notes array: store fetch results to be display on the view
data service: the static instance of our PersistenceController class
showAlert: this boolean variable will be used to toggle the input windows for users to enter a note title and body;
noteTitle, noteBody, noteIsFav: the states to accept changes may be the user
getAllNotes(). this function is calling the read function in the data service to get all notes saved.
createNote(). this function creates a new note with information in the state properties.
toggleFav(). this function toggles the value of
isFavoriteof an existing note.deleteNote(). this function calls the delete function in the data service eto delete a note.
clearState(). this function resets all
title,body, andisFavoritewhen the user input some texts and cancels without saving the note.
class ViewModel: ObservableObject {
    // save fetched notes for view loading
    @Published var notes: [Note] = []

    let dataService = PersistenceController.shared

    //states
    @Published var showAlert: Bool = false
    @Published var noteTitle: String = ""
    @Published var noteBody: String = ""
    @Published var noteIsFav: Bool = false

    init() {
        getAllNotes()
    }

    func getAllNotes() {
        notes = dataService.read()
    }

    func createNote() {
        dataService.create(title: noteTitle, body: noteBody, isFavorite: noteIsFav)
        getAllNotes()
    }

    func toggleFav(note: Note) {
        dataService.update(entity: note, isFavorite: !note.isFavorite)
        getAllNotes()
    }

    func deleteNote(note: Note) {
        dataService.delete(note)
        getAllNotes()
    }

    func clearStates() {
        showAlert = false
        noteTitle = ""
        noteBody = ""
        noteIsFav = false
    }
}
Step 8 - Finally, our Content View
The SwiftUI view contains a Navigation Stack with a new note button. If no note is found, only a message will be shown. If there’re notes in the data base, a List of notes will be populated, with information such as title, body, date of creation and favorite tag. The users can tap on the view favorite icon to turn it on or off, and swipe a row to have the note deleted.
import SwiftUI

struct ContentView: View {
    @StateObject var vm: ViewModel = ViewModel()

    var body: some View {
        NavigationStack {
            Group {
                // when no notes found, display a hint message
                if vm.notes.count == 0 {
                    Text("No note saved yet. Press the New button to create one")
                        .bold()
                        .foregroundColor(.secondary)
                } else {
                    List {
                        ForEach(vm.notes) { note in
                            // Note Row
                            HStack {
                                VStack(alignment: .leading) {
                                    HStack {

                                        // title
                                        Text(note.title ?? "")
                                            .font(.title3)
                                            .lineLimit(1)
                                            .bold()

                                        // date
                                        Text(note.createdAt?.asString() ?? "")
                                            .lineLimit(1)
                                    }

                                    // body preview
                                    Text((note.body ?? ""))

                                        .lineLimit(1)
                                }
                                Spacer()

                                // fav icon
                                Image(systemName: note.isFavorite ? "star.fill" : "star")
                                    .onTapGesture {
                                        vm.toggleFav(note: note)
                                    }
                                    .foregroundColor(note.isFavorite ? .yellow : .secondary)
                            }

                            // delete option on swipe
                            .swipeActions {
                                Button(role: .destructive) {
                                    vm.deleteNote(note: note)
                                } label: {
                                    Label("Delete", systemImage: "trash")
                                }
                            }
                        }
                    }
                }
            }
            .navigationTitle("Notes")
            .toolbar {
                // new note button
                Button("New") {
                    vm.showAlert = true
                }
                .alert(vm.noteTitle, isPresented: $vm.showAlert, actions: {
                    TextField("Title", text: $vm.noteTitle)
                    TextField("Body", text: $vm.noteBody)
                    Button("Save", action: {
                        vm.createNote()
                        vm.clearStates()
                    })
                    Button("Cancel", role: .cancel, action: { vm.clearStates() })
                }) {
                    Text("Create a new note")
                }
            }
        }
    }
}

struct ContentView_Previews: PreviewProvider {
    static var previews: some View {
        ContentView()
    }
}
And that’s all for this demo. I know it might be a lot if you’re new to Core Data, and this is for just one entity. In short, you’ll need to set up Core Data in a Persistence Controller and define CRUD functions. I hope this article helps, and remember to leave a comment and subscribe to my newsletter. Happy Friday! ¡Hasta mañana!


