Color Scheme Preference in SwiftUI
In today’s post, I’m going to demonstrate how to create a picker that allows the user to select the preferred color scheme - light, dark or follow the system appearance setting and to have this setting stored.
The source code of this post is available here.
Step 1 - Create a Settings View
First let’s create a settings view quickly, by creating a NavigationStack, or a NavigationView (before iOS 16). Then add a List element with a navigation title "Settings". And lastly, add a Section with the title "Appearance"; for now we can leave the content of the section blank.
struct ContentView: View {
    var body: some View {
        NavigationStack {
            List {
                Section("Appearance") {
                    //...
                }
            }
            .navigationTitle("Settings")
        }
    }
}

Step 2 - AppStorage property
Before we add a picker for users to select an option, we need a property to hold the value selected. Instead of using the property wrapper @State , we’re going to use @AppStorage this time, in order to save the option selected.
@AppStorage is introduced in iOS 14, and its nature is a property wrapper that uses UserDefaults to get and set values for a key automatically.
Let’s add the property before the body property: after the property wrapper name, write a key to UserDefaults storage and then assign "system" as the initial value of this property.
struct ContentView: View {
    @AppStorage("colorScheme") var selectedColorScheme: String = "system"

    var body: some View {
        //...
    }
}
Step 3 - Add a Picker within List Section
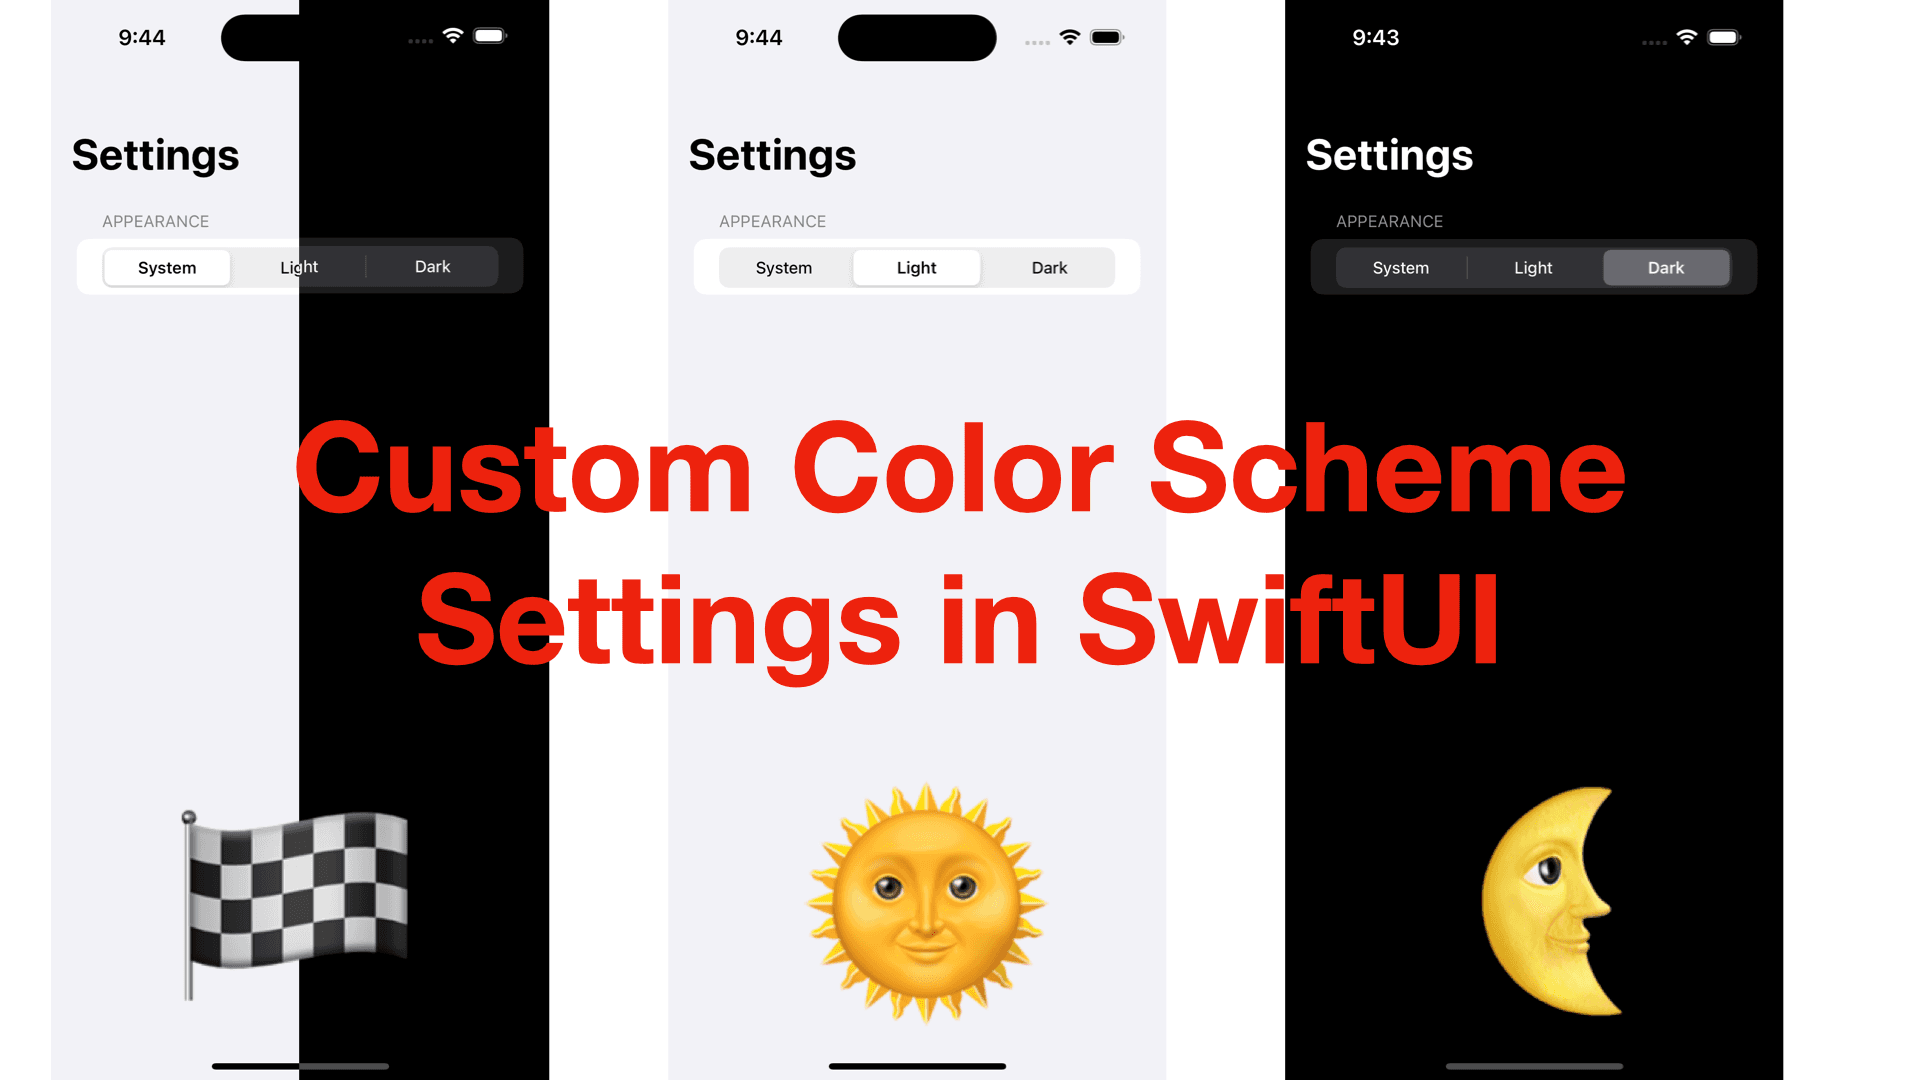
Now within the List section, we can add a picker.
The selection is the property selectedColorScheme we defined in Step 2. The contents are the options the users can select: system, light and dark. The text value is the text that will show up in the picker, and the strings in the tag modifiers are the values to be stored in UserDefaults via AppStorage. We can also add a pickerStyle style modifier to change how it looks like. The values include .segmented, .inline, .wheel and .menu.
Picker(selection: $selectedColorScheme, label: Text("Color Scheme")) {
    Text("System").tag("system")
    Text("Light").tag("light")
    Text("Dark").tag("dark")
}
.pickerStyle(.segmented)
Once done, we can see the picker in the settings menu.

Step 4 - Get the color scheme
You might have already noticed that the view still seems in the light mode, even when "Dark" is selected. That’s because we haven't converted the value from AppStorage to a ColorScheme to be applied to the view. Let’s do this now.
Inside the view after the body property, add a private function that returns an optional of ColorScheme. It takes the private property selectedColorScheme and the switch statement checks its value. For "light" and "dark", the respective color scheme will be returned. For "system" or other values (default), the function returns nil.
private func getPreferredColorScheme() -> ColorScheme? {
    switch selectedColorScheme {
    case "light":
        return .light
    case "dark":
        return .dark
    default:
        return nil
    }
}
Step 5 - Apply the color scheme in the view
In this step we just need to add a modifier .preferredColorScheme and call the function as it’s returning an optional color scheme. Note that if the function returns nil, the view will be using the color scheme in system settings.
.preferredColorScheme(getPreferredColorScheme())
Now you can see when you select "Dark", the view will be in dark mode, regardless of your device setting. Note: the preview environment might override the setting, please test this functionality in a simulator or a physical device.
Tip: In the simulator, you can toggle the appearance setting with cmd + shift + A.
Try to change the setting and restart the app, you’ll see the preference will be saved.

That’s all of this post. Hope you learned how you can implement an appearance (color scheme) setting. If you have a question, please leave a comment. Also, remember to subscribe to my newsletter to get more posts like this via email. See you all in the next post.


